
Broward: 954-341-4323
Palm Beach: 561-558-0770

MEGA SHOWROOM:
9853 W. Sample Rd,
Coral Springs, FL 33065
HOURS: M-F: 9am-6pm SAT: 10am-4pm

Author: Jonas

  • Cordless vs. Full-Size Vacuums for Boca Raton Condos and Homes

    Cordless vs. Full-Size Vacuums for Boca Raton Condos and Homes

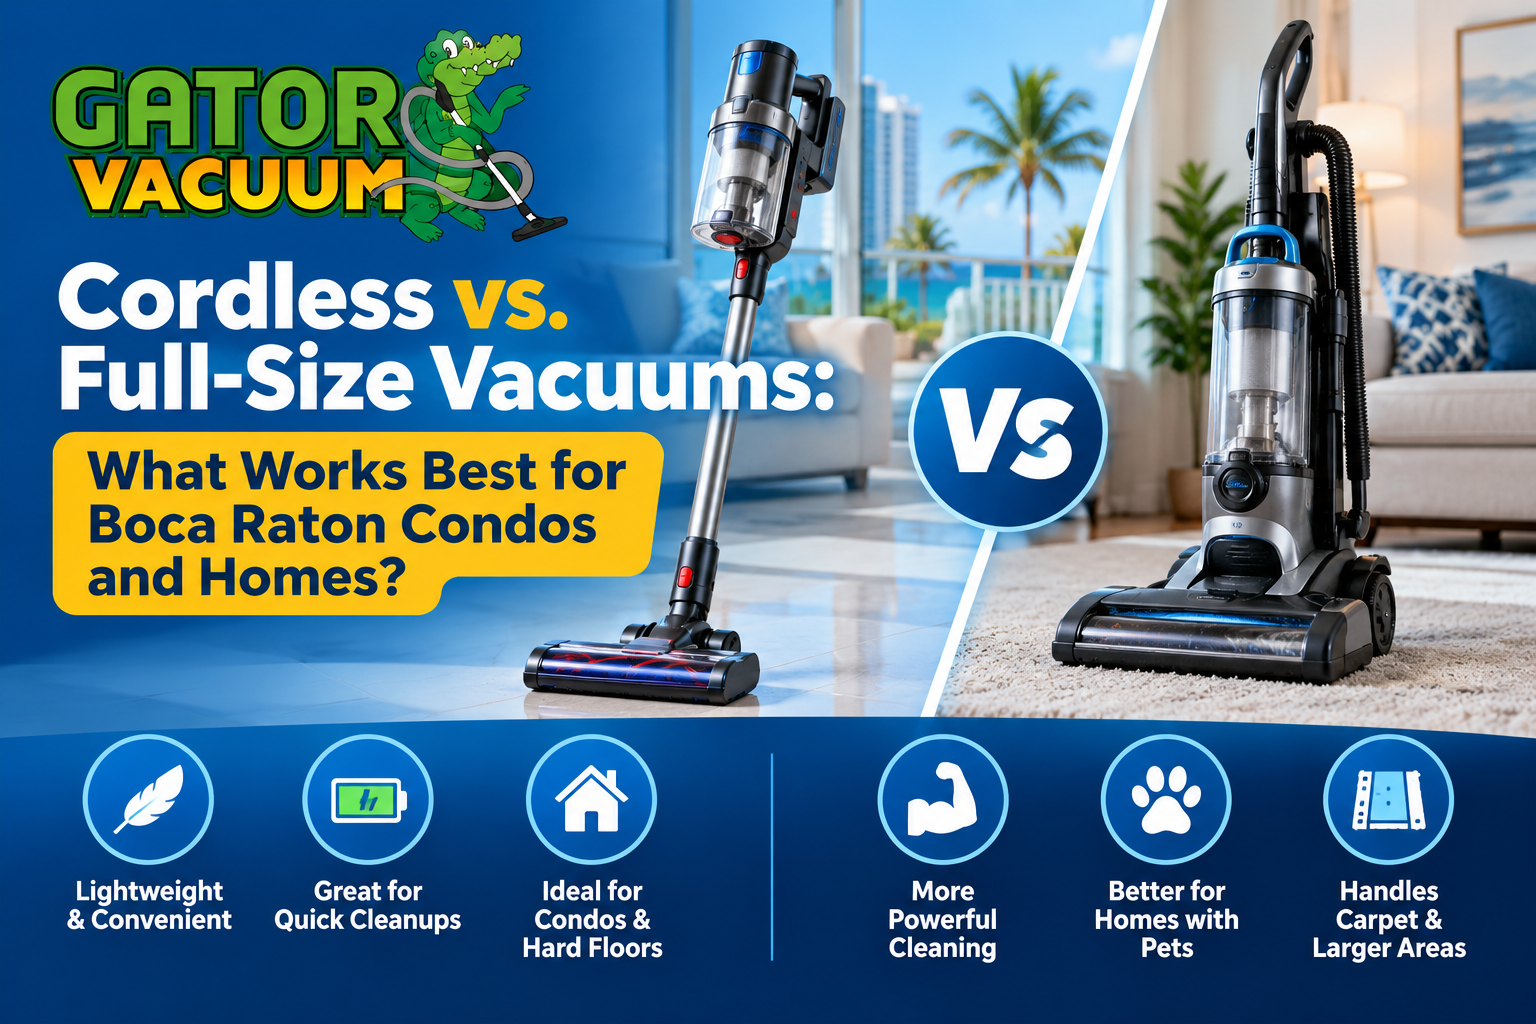
    Cordless vs. Full-Size Vacuums: What Works Best for Boca Raton Condos and Homes?

    Choosing a new vacuum can be surprisingly complicated. Walk into a store or start shopping online and you will quickly find dozens of options, from lightweight cordless stick vacuums to powerful full-size uprights and canister vacuums. While cordless models are convenient and easy to grab for quick cleanups, they are not always the best choice as the primary vacuum for every home.

    For homeowners and condo residents in Boca Raton, the right vacuum depends on several factors, including the size of the home, flooring type, pets, area rugs, storage space, filtration needs, and how much cleaning you expect your vacuum to handle.

    So, is a cordless vacuum enough, or do you still need a full-size vacuum?

    The answer depends on your home and your cleaning habits.

    Cordless Vacuums: Where They Really Shine

    Cordless stick vacuums have become extremely popular because they eliminate the hassle of dealing with a power cord. They are lightweight, easy to maneuver, and can usually be stored in a small closet or utility area.

    For many Boca Raton condos and smaller homes, these features can make a cordless vacuum an attractive option.

    Quick Everyday Cleaning

    A cordless vacuum is excellent for cleaning up crumbs, tracked-in dirt, sand, pet hair, and other everyday debris. Instead of pulling a full-size vacuum out of storage, you can grab a cordless model and quickly clean a kitchen, hallway, bedroom, or living room.

    This convenience can be particularly useful in households where small messes happen frequently.

    Excellent for Tile and Hard Floors

    Many South Florida homes have substantial amounts of tile, porcelain, stone, or other hard flooring. Cordless vacuums can be very effective on these surfaces, particularly when equipped with a soft roller or floor head designed for hard floors.

    They can easily pick up dust, crumbs, hair, and fine debris without requiring the bulk of a traditional vacuum.

    Easy Storage

    Storage space can be a major consideration in a condo.

    A full-size vacuum may require a dedicated closet or storage area, while a cordless stick vacuum can often be mounted on a wall or tucked into a small space. For a smaller Boca Raton condo where storage is limited, that convenience can be a significant advantage.

    Easy to Grab

    Perhaps the biggest advantage is simply accessibility.

    The easier a vacuum is to grab, the more likely you are to use it regularly. A cordless vacuum sitting on a convenient charging station can make quick daily cleaning much easier.

    The Limitations of Cordless Vacuums

    Cordless vacuums are convenient, but convenience does not necessarily mean they can replace a full-size vacuum in every household.

    Battery life is one of the biggest limitations.

    Manufacturers may advertise impressive maximum battery runtimes, but actual cleaning time can vary depending on the power setting, floor head, and cleaning mode. Using a higher suction setting can reduce available runtime considerably.

    For a small condo, this may not be a problem. For a larger home, however, stopping to recharge a vacuum in the middle of cleaning can become frustrating.

    Dust capacity is another consideration. Many cordless models have relatively small dust bins. If you have pets, multiple bedrooms, or a larger home, you may find yourself emptying the bin frequently.

    Why Full-Size Vacuums Still Matter

    A quality upright or canister vacuum remains an excellent choice for homeowners who want a primary cleaning machine capable of handling larger areas and more demanding cleaning jobs.

    Full-size vacuums generally provide greater capacity and are designed for extended cleaning sessions.

    Better for Larger Homes

    If you have a larger Boca Raton home with multiple bedrooms, hallways, living spaces, and area rugs, a full-size vacuum may be more practical.

    You can clean more area without worrying about battery life or constantly emptying a small dust bin.

    Stronger Cleaning Performance

    A quality full-size vacuum can provide the airflow, suction, and agitation needed to remove embedded dirt and debris from carpeting and rugs.

    This is especially important if your home has a combination of tile, hardwood or other hard flooring, and area rugs.

    Surface debris is only part of what a vacuum needs to remove. Dirt can become embedded in carpet fibers and rugs, where a lightweight stick vacuum may not provide the same level of deep-cleaning performance as a well-designed full-size machine.

    Better for Homes with Pets

    Pet owners often place much greater demands on their vacuum.

    Dog and cat hair can accumulate quickly on floors, rugs, furniture, and upholstery. A full-size vacuum with an effective brush roll, strong airflow, and appropriate filtration can be a better primary machine for homes with multiple pets.

    A cordless vacuum can still be extremely useful for quick pet-hair cleanup, but some households will benefit from having a more substantial vacuum for regular deep cleaning.

    Upright vs. Canister Vacuums

    If you decide that a full-size vacuum makes more sense for your home, you still have another decision to make: upright or canister?

    Upright Vacuums

    Upright vacuums are a popular choice for homes with substantial carpet and area rugs. They typically provide a wide cleaning path and are convenient for covering larger floor areas.

    Many modern uprights also offer settings or attachments for hard floors, making them suitable for homes with mixed flooring.

    An upright can be a good choice if you want a dedicated primary vacuum that is straightforward to use and easy to move from room to room.

    Canister Vacuums

    Canister vacuums offer a different approach.

    The motor and collection system remain in the canister while you move a hose and cleaning wand across the floor. This design can be particularly convenient for homes with a lot of hard flooring, stairs, furniture, and areas that require more maneuverability.

    A canister can also make it easier to clean underneath furniture and reach tight spaces.

    For a Boca Raton home with mostly tile or hard flooring and a mixture of area rugs, a quality canister vacuum may be worth considering.

    What About Boca Raton’s Tile Floors?

    Flooring should be one of the first things you consider when choosing a vacuum.

    Many Boca Raton homes and condos have tile or other hard surfaces throughout much of the living space. These floors can collect fine dust, sand, crumbs, pet hair, and other debris that gets tracked inside.

    A vacuum designed for hard floors should move easily across the surface without relying exclusively on an aggressive carpet brush.

    If your home is mostly tile with a few area rugs, you may not need a heavy-duty carpet vacuum as your only consideration. Instead, look for a machine that can transition effectively between hard flooring and rugs.

    Area Rugs Change the Equation

    Area rugs can make vacuum selection more complicated.

    A vacuum that works beautifully on tile may not provide enough agitation for thicker rugs. Conversely, a powerful carpet-oriented brush roll may not be the best choice for delicate flooring or certain rugs.

    If your Boca Raton home has several area rugs, consider how thick they are, what they are made from, and whether you need to clean both the rug surface and the hard floor underneath.

    A vacuum with adjustable cleaning settings or interchangeable tools can offer greater versatility.

    Do You Have Pets?

    Pet ownership is another major factor.

    If you have one or more dogs or cats, consider:

    • How effectively the vacuum handles pet hair

    • Brush roll design

    • Hair wrap resistance

    • Filtration

    • Dust capacity

    • Upholstery cleaning tools

    • Ease of emptying or replacing bags

    • Availability of replacement parts

    A cordless vacuum can be an excellent secondary machine for quickly picking up hair between regular cleanings.

    However, if you are constantly dealing with pet hair throughout the home, a full-size vacuum may be a better choice for your primary cleaning needs.

    Filtration Matters More Than You Might Think

    Vacuum performance isn’t only about suction.

    Filtration plays an important role in determining what happens to the fine particles that enter the vacuum. A good filtration system can help keep captured dust and fine debris contained instead of allowing it to pass back into the room.

    This is particularly worth considering if your household is sensitive to dust or if your home accumulates a lot of fine particles.

    When comparing vacuums, look beyond marketing terms and consider the actual filter system, whether filters are washable or replaceable, and how easy they are to maintain.

    Don’t Forget About Repairability

    One of the biggest differences between buying a vacuum as a long-term appliance and buying one primarily for convenience is what happens when something eventually wears out.

    Brush rolls, belts, filters, hoses, batteries, switches, and other components can eventually require maintenance or replacement.

    Before purchasing a vacuum, consider whether replacement parts are readily available and whether the machine can be serviced.

    A vacuum that can be properly maintained may provide value well beyond its initial purchase price.

    This is one area where a local vacuum dealer and repair shop can be particularly helpful. Instead of treating a vacuum as disposable, professional service can sometimes keep a quality machine working for many years.

    Cordless or Full-Size? A Simple Comparison

    FeatureCordless Stick VacuumFull-Size Upright/Canister
    Quick cleanupsExcellentGood
    Small condosExcellentGood
    Larger homesFair to GoodExcellent
    Tile floorsExcellentExcellent
    Area rugsGoodExcellent
    Deep carpet cleaningFair to GoodExcellent
    Pet hairGoodExcellent
    Storage spaceExcellentFair to Good
    Battery concernsYesNo
    Large cleaning jobsFairExcellent
    Dust capacityUsually smallerUsually larger
    Long-term serviceabilityVaries by modelOften better
    ConvenienceExcellentGood

    The Best Choice May Be Both

    There is no rule saying you have to choose only one.

    For many households, the ideal setup is a cordless vacuum for daily maintenance and a full-size vacuum for deeper cleaning.

    For example, a Boca Raton condo with mostly tile floors might use a cordless vacuum several times a week for crumbs, sand, and pet hair, while a full-size canister vacuum handles area rugs, upholstery, and more thorough cleaning.

    A larger home might use the cordless vacuum for quick kitchen and bathroom cleanups while relying on an upright or canister for weekly whole-house cleaning.

    This combination gives you convenience without sacrificing cleaning performance.

    What Should Boca Raton Homeowners Consider Before Buying?

    Before choosing a new vacuum, think about your actual home rather than simply choosing the newest or most heavily advertised model.

    Ask yourself:

    How large is my home?
    A small condo may not require the capacity of a large full-size machine.

    What type of flooring do I have?
    Tile, hardwood, carpet, and area rugs can all have different cleaning requirements.

    Do I have pets?
    Pet hair can quickly expose the limitations of a lightweight vacuum.

    How often do I vacuum?
    If you clean every day, convenience may be especially important.

    How much storage space do I have?
    A compact cordless model can be easier to store in a condo.

    Do I want one vacuum to do everything?
    If so, a versatile full-size machine may provide greater capability.

    Can I get replacement parts and service?
    Consider the long-term ownership experience, not just the initial purchase.

    Visit Gator Vacuum & Sewing for Help Choosing the Right Vacuum

    There is no single vacuum that is perfect for every Boca Raton home.

    A cordless stick vacuum can be an excellent solution for convenience, smaller spaces, and everyday cleanup. A quality upright or canister vacuum can provide the capacity, power, filtration, and versatility needed for larger homes, pets, rugs, and more demanding cleaning.

    The right choice comes down to how your home is actually used.

    If you’re comparing vacuum options and aren’t sure which type makes the most sense, Gator Vacuum & Sewing can help you evaluate your choices based on your flooring, home size, cleaning needs, and budget. Seeing different vacuum styles in person can also make it much easier to compare maneuverability, attachments, cleaning systems, and overall design.

    Whether you’re looking for a convenient cordless vacuum for a Boca Raton condo or a full-size vacuum capable of handling an entire home, choosing the right machine can make everydaycleaning easier and help you get better long-term value from your purchase.
    Choosing between a cordless stick vacuum and a full-size machine often comes down to your flooring, home size, pets, and cleaning routine. If you already own a vacuum that is not performing the way it should, our vacuum repair services can help determine whether repair makes more sense than replacement.
    A vacuum that loses suction, has a worn brush roll, or needs a new belt does not always need to be replaced. Gator Vacuum & Sewing provides professional vacuum repair to help extend the life of many upright, canister, and other vacuum systems.
    Before replacing your current vacuum, it may be worth having it inspected, especially if the problem is limited to a serviceable part. Visit our vacuum repair service page to learn more about available repair options.
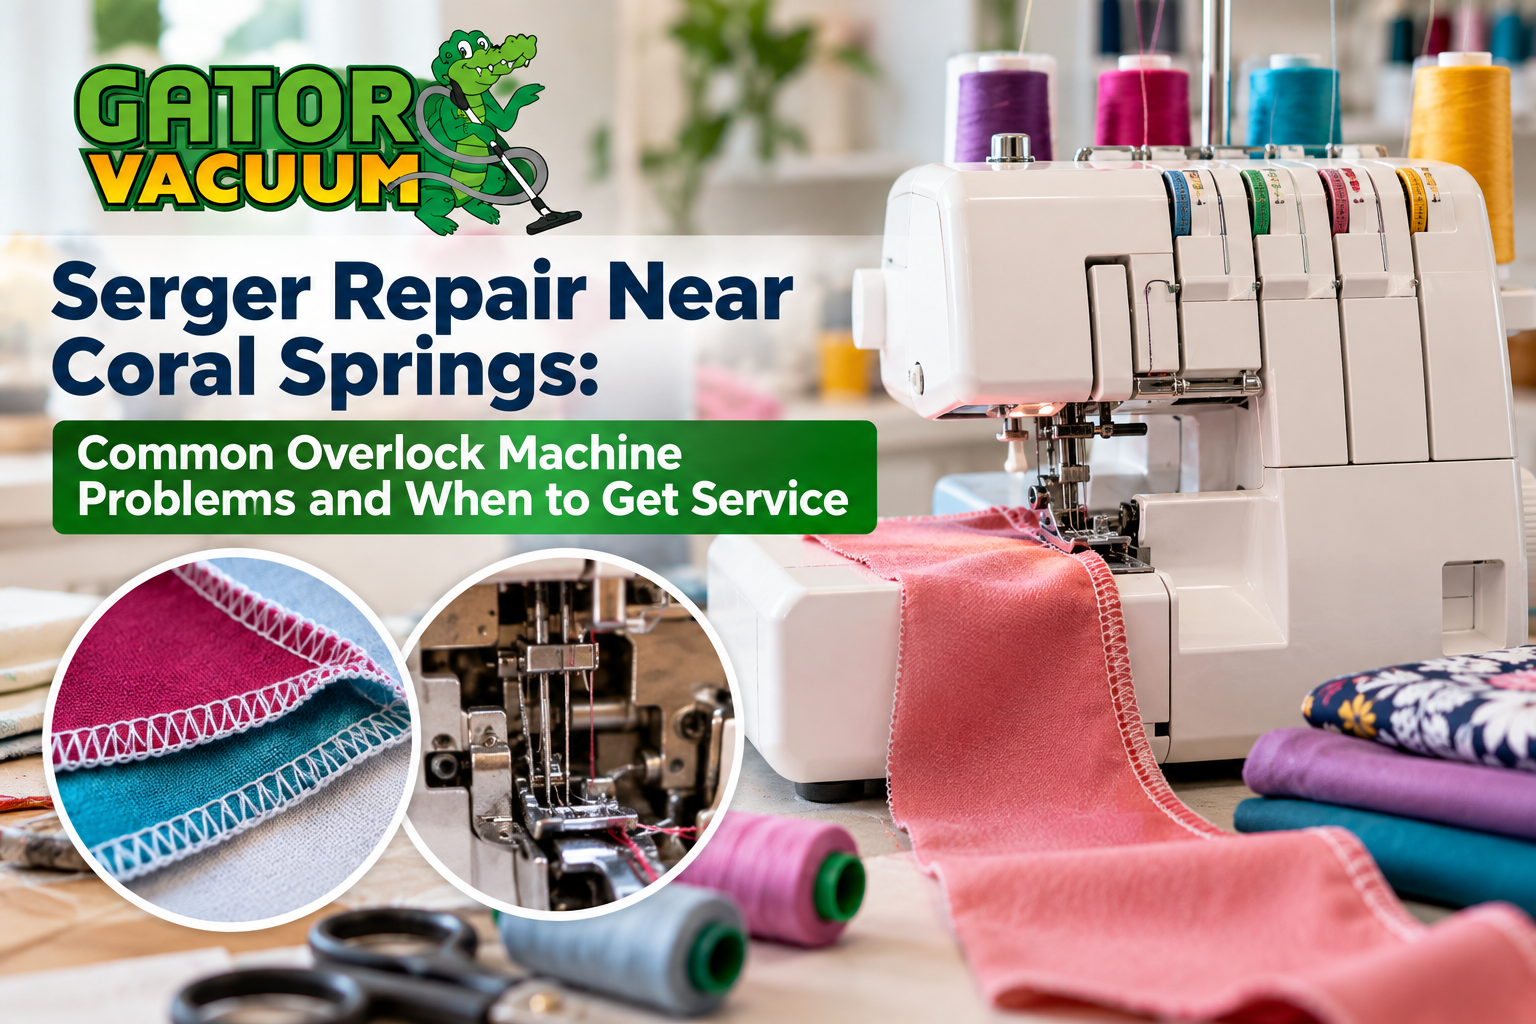

  • Serger Repair Near Coral Springs: Common Overlock Machine Problems | Sewing Machine Repairs

    Serger Repair Near Coral Springs: Common Overlock Machine Problems | Sewing Machine Repairs

    Serger Repair Near Coral Springs: Common Overlock Machine Problems and When to Get Service

    Sergers, also called overlock machines, are designed to do something a traditional sewing machine cannot: trim fabric edges while simultaneously forming a finished seam. They are especially useful for garment sewing, stretch fabrics, knits, and projects where a clean, professional edge is important.

    But because Sergers use multiple threads, loopers, needles, knives, tension systems, and precisely timed moving parts, they can also be more complicated to troubleshoot when something goes wrong.

    If your Serger is suddenly breaking thread, skipping stitches, cutting unevenly, creating loose loops, or making unusual noises, the problem may be more than a simple threading mistake.

    For homeowners, sewists, and garment makers in Coral Springs and surrounding South Florida communities, professional Serger repair can help identify the underlying problem before a small issue turns into a major repair.

    At Gator Vacuum & Sewing, sewing machine service goes beyond traditional household sewing machines. Our technicians work with different types of sewing equipment, including Sergers and overlock machines, helping customers get their machines operating properly again.

    What Is a Serger or Overlock Machine?

    A Serger is a specialized sewing machine that uses multiple threads to create finished seams and edges. Depending on the machine and stitch configuration, a Serger can use two, three, four, or even more threads.

    Unlike a conventional sewing machine, a Serger typically combines several functions in one operation:

    • Trimming the fabric edge

    • Forming an overlock stitch

    • Securing the edge of the fabric

    • Creating stretchable seams

    • Finishing raw fabric edges

    The machine’s loopers and needles must work together with precise timing. The cutting knives must also remain properly positioned relative to the fabric and stitching area.

    That combination makes a Serger extremely useful, but it also means that mechanical problems can require specialized service.

    Common Serger Problems Coral Springs Sewists May Encounter

    1. Serger Thread Keeps Breaking

    Frequent thread breaks are one of the most frustrating problems with an overlock machine.

    There are several possible causes, including incorrect threading, excessive tension, damaged thread guides, a dull or damaged needle, poor-quality thread, or a mechanical problem inside the machine.

    Because a Serger has multiple thread paths, even one incorrectly threaded section can affect the entire stitch formation.

    Start by checking the threading path and making sure each thread is properly seated in its tension system. If the machine continues breaking thread after it has been correctly rethreaded, it may be time for professional service.

    A technician can inspect the thread guides, tension components, needles, loopers, and other areas that may be contributing to repeated thread breaks.

    2. Skipped Stitches

    Skipped stitches can leave gaps in an otherwise finished seam.

    A damaged, bent, or incorrectly installed needle is one possible cause. The wrong needle type or size can also create problems depending on the fabric and thread being used.

    However, persistent skipped stitches may indicate a mechanical or timing issue.

    Sergers rely on precise coordination between the needles and loopers. If those components are no longer moving together correctly, the machine may fail to form stitches consistently.

    If changing the needle and checking the threading does not solve the problem, professional Serger repair may be necessary.

    3. The Serger Is Not Cutting Fabric Correctly

    The cutting system is one of the defining features of an overlock machine.

    If your Serger is struggling to trim fabric, leaving uncut sections, pulling fabric into the cutting area, or producing an uneven edge, the knives may need attention.

    Possible causes include:

    • Dull cutting blades

    • Improper knife positioning

    • Fabric feeding problems

    • Debris around the cutting area

    • Mechanical wear

    • Incorrect machine adjustments

    Trying to force fabric through a Serger that is not cutting properly can make the problem worse.

    A professional technician can inspect the cutting mechanism and determine whether the knives need adjustment, replacement, or whether another mechanical issue is affecting the cutting performance.

    4. Uneven Seams or Inconsistent Stitching

    A properly functioning Serger should produce consistent stitches as fabric moves through the machine.

    If your seams suddenly become uneven, wavy, loose, or inconsistent, check the basics first. Make sure the fabric is feeding properly and that the machine is threaded correctly.

    Differential feed settings can also affect how fabric behaves, particularly when sewing stretchy or lightweight materials.

    However, if the machine continues producing inconsistent seams despite correct settings, the problem may involve the feed system, tension, presser-foot pressure, stitch formation, or internal adjustments.

    This is especially important when the problem occurs across different fabrics and stitch settings.

    5. Loops Are Too Loose or Too Tight

    Loop formation is a major part of Serger stitching.

    When the loops extend too far over the fabric edge, disappear into the seam, or appear excessively tight, the tension system may need adjustment.

    Serger tension problems can be caused by:

    • Incorrect threading

    • Improper tension settings

    • Thread caught around a guide

    • Dirty or obstructed tension components

    • Incorrect thread combinations

    • Mechanical wear

    It can be tempting to keep turning tension dials in an attempt to correct the stitch. But constantly changing settings without identifying the underlying problem can make troubleshooting more difficult.

    If the machine previously produced good stitches but suddenly develops persistent looping or tension problems, professional inspection can help determine whether the issue is adjustment-related or mechanical.

    6. Serger Tension Problems That Won’t Go Away

    Serger tension can be more complicated than tension on a standard sewing machine because several threads work together to create one finished stitch.

    If one thread is too loose, another is too tight, or the balance changes during sewing, the finished seam can look uneven.

    Before scheduling service, confirm that:

    1. The machine is threaded according to its threading diagram.

    2. Each thread is properly seated in the tension discs.

    3. The needles are installed correctly.

    4. The thread is appropriate for the machine and project.

    5. The tension settings match the stitch configuration.

    If these checks do not correct the problem, the machine may need professional adjustment or repair.

    7. The Serger Is Making Unusual Noises

    Sergers naturally make more mechanical noise than some basic sewing machines because they contain multiple moving components.

    However, a sudden change in sound should not be ignored.

    Pay attention to noises such as:

    • Grinding

    • Clicking

    • Knocking

    • Repeated tapping

    • Squealing

    • Rattling

    • A motor that sounds strained

    A new noise may indicate a problem with a moving component, needle, looper, cutting mechanism, belt, motor, or another internal part.

    Continuing to operate the machine when it is making a severe or unusual noise can potentially cause additional damage.

    If the noise appeared suddenly, stop sewing and have the machine inspected.

    8. Serger Timing Problems

    Timing is particularly important on an overlock machine.

    The needles, upper looper, lower looper, feed system, and other components must move in a precise sequence to create the stitch.

    When timing is incorrect, a Serger may experience several symptoms at once:

    • Skipped stitches

    • Broken needles

    • Broken thread

    • Poor loop formation

    • Needles contacting loopers

    • Inconsistent stitching

    • Unusual mechanical sounds

    Timing problems generally are not something that should be corrected by repeatedly changing tension settings.

    If your Serger has suffered an impact, jam, broken needle incident, or sudden mechanical failure and the stitching is no longer forming correctly, professional service is recommended.

    When Should You Take a Serger in for Repair?

    Not every Serger problem requires immediate professional service. Some issues can be resolved by cleaning the machine, replacing the needle, checking the thread, or carefully following the manufacturer’s threading instructions.

    Professional repair becomes more appropriate when the problem is persistent or mechanical.

    Consider having your Serger serviced if:

    • Thread continues breaking after proper rethreading

    • Stitches remain skipped after changing the needle

    • The machine will not form a proper stitch

    • The knives are not cutting correctly

    • The machine makes unusual mechanical noises

    • The needle is striking another component

    • Loopers appear to be hitting the needles

    • Tension cannot be balanced

    • The machine jams repeatedly

    • Stitch quality suddenly changes

    • The machine was dropped or damaged

    • A broken needle may have affected the internal mechanism

    The key is to address recurring problems before continued use causes additional wear.

    Why Serger Repair Requires Specialized Attention

    A Serger is not simply a sewing machine with extra thread.

    Its stitch formation depends on several systems working together. Thread tension, needle position, looper movement, fabric feeding, cutting, and timing all have to work in coordination.

    That means a problem that looks like a tension issue could actually be caused by threading, a damaged needle, incorrect timing, a looper problem, or another mechanical issue.

    Proper diagnosis is important because adjusting one component without addressing the actual cause can sometimes create additional problems.

    Serger Repair Near Coral Springs

    If you’re searching for Serger repair near Coral Springs, Gator Vacuum & Sewing provides sewing machine service for customers who need more than basic maintenance.

    Our sewing machine repair services extend beyond traditional household sewing machines to specialized equipment such as Sergers and overlock machines.

    Whether your machine is experiencing thread breaks, skipped stitches, tension problems, cutting issues, uneven seams, unusual noises, or possible timing problems, having the machine properly inspected can help determine what needs to be corrected.

    Gator Vacuum & Sewing serves Coral Springs and surrounding communities throughout Broward County. Our technicians can evaluate your machine, identify mechanical or adjustment issues, and determine the appropriate repair or service.

    Don’t Let a Serger Problem Stop Your Sewing Projects

    A Serger can save considerable time when finishing seams and working with garments, stretch fabrics, and professional-looking edges. When the machine stops producing consistent results, however, continuing to troubleshoot without identifying the actual cause can become frustrating.

    Some problems are simple threading or needle issues. Others involve tension systems, loopers, cutting mechanisms, feed components, or timing that require professional attention.

    If your overlock machine is repeatedly giving you problems, professional Serger repair near Coral Springs can help get your machine back to reliable operation and get you back to sewing.

    For Serger and sewing machine repair in Coral Springs and nearby South Florida communities, contact Gator Vacuum & Sewing to have your machine evaluated by experienced sewing machine technicians.

    Use this sewing repair URL for the internal links in this blog:
    If your serger keeps breaking thread, skipping stitches, or producing uneven seams even after proper rethreading, the issue may require more than a basic adjustment. Gator Vacuum & Sewing provides professional sewing machine repair for sergers, overlock machines, and other sewing equipment.
    Problems with tension, loopers, cutting knives, or machine timing can be difficult to diagnose without the right tools and experience. Our serger and sewing machine repair services can help identify the underlying mechanical issue and determine the correct repair.
    If your serger is making unusual noises, jamming repeatedly, or no longer forming stitches correctly, professional inspection may help prevent further damage. Visit our sewing machine repair page to learn more about service options for sergers and overlock machines in Coral Springs and surrounding areas.

  • Why South Florida Sand Is Tough on Vacuums in Pompano Beach Homes

    Why South Florida Sand Is Tough on Vacuums in Pompano Beach Homes

    Why South Florida Sand and Fine Dust Are Tough on Vacuums in Pompano Beach Homes

    If you live in Pompano Beach, you already know that sand has a way of getting everywhere.

    It comes home from the beach on shoes, towels, beach bags, clothing, and pets. It gets tracked in from the garage, pool deck, patio, and backyard. Even when you don’t live directly on the beach, South Florida’s outdoor lifestyle means your vacuum may be dealing with far more sand and fine dust than the average household vacuum was designed to handle.

    That constant exposure can take a toll on your vacuum.

    Sand can collect in brush rolls, bags, dirt containers, hoses, and filters. Fine dust can restrict airflow and cause a vacuum to lose performance. When sand is mixed with pet hair, carpet fibers, and everyday household dirt, your vacuum may have to work even harder.

    Understanding how South Florida sand affects your vacuum can help you choose the right equipment and know when routine maintenance is needed.

    Sand Doesn’t Stay at the Beach

    One of the biggest challenges for Pompano Beach homeowners is simply how easily sand travels.

    A trip to the beach doesn’t have to involve walking through the house with sandy feet for sand to end up indoors. Small particles can cling to shoes, clothing, towels, bags, and pets.

    The same thing happens around other outdoor areas of the home.

    Pool decks, patios, garages, driveways, screened porches, and outdoor entertaining areas can all introduce dirt and fine particles into the house.

    Over time, that debris collects in the places where you spend the most time.

    That’s why some Pompano Beach homeowners may find themselves vacuuming more frequently than they expected.

    Why Fine Dust Can Be a Problem

    Large pieces of debris are usually easy for a vacuum to collect. Fine dust is different.

    Very small particles can move through the vacuum’s airflow and accumulate on filters. As the filter becomes loaded with dust, airflow can become restricted.

    When airflow drops, the vacuum may not pick up debris as effectively.

    You might notice:

    • The vacuum doesn’t seem as powerful

    • Sand is left behind after cleaning

    • You need to make multiple passes

    • The vacuum sounds different

    • The filter becomes dirty quickly

    • The machine appears to run hotter

    • Cleaning takes longer than it used to

    A dirty filter isn’t always the only possible cause of reduced suction, but it is one of the first things worth checking.

    Sand Can Fill Your Vacuum Faster Than You Think

    Sand is heavy compared with ordinary household dust.

    If you’re regularly vacuuming sand from tile floors, entryways, rugs, and other areas, the vacuum’s bag or dirt container can fill faster than it would in a home with less outdoor debris.

    This is especially important for homeowners who wait until a bag is completely full before changing it.

    Depending on the vacuum, a full or heavily loaded bag can affect airflow and cleaning performance.

    Bagless machines require their own maintenance routine. Dirt containers need to be emptied, and filters may need to be cleaned or replaced according to the manufacturer’s recommendations.

    The important thing is to monitor the vacuum rather than assuming it can continue operating at peak performance indefinitely.

    Sand and Your Vacuum’s Brush Roll

    The brush roll is another component that can take a beating from frequent sand pickup.

    When a powered brush roll is operating on carpet or rugs, it is constantly making contact withdebris. Sand can work into areas around the brush roll while hair, string, and fibers can wrap around it.

    For homes with pets, this can become an even bigger issue.

    A brush roll may end up dealing with a combination of:

    • Sand

    • Pet hair

    • Human hair

    • Carpet fibers

    • Threads

    • Dust

    • Larger pieces of debris

    Over time, buildup can interfere with the brush roll’s ability to spin properly.

    Checking and cleaning the brush roll regularly is one of the easiest ways to help prevent unnecessary problems.

    Tile Floors Need the Right Vacuum Attachment

    Pompano Beach homes often have tile and other hard flooring because these surfaces are practical for Florida living.

    But cleaning sand from tile isn’t always as simple as it looks.

    Fine sand can settle into grout lines, collect around baseboards, and gather underneath furniture. A vacuum that is excellent on carpet isn’t necessarily the best tool for every hard-floor surface.

    That’s where the right attachment becomes important.

    A dedicated bare-floor tool can help collect fine dust and larger particles while allowing the vacuum to move smoothly across hard flooring.

    If your home has mostly tile with a few area rugs, you may want a vacuum system that can transition easily between those surfaces rather than relying on one attachment for everything.

    What About Area Rugs?

    Area rugs can hide sand surprisingly well.

    Instead of remaining on top of the floor, particles can work down between rug fibers. Walking across the rug can push them even deeper.

    A vacuum with appropriate agitation can help loosen this debris so the vacuum can collect it.

    However, different rugs require different cleaning approaches. A powerful brush roll may be useful for some rugs and inappropriate for others.

    If your home contains tile, delicate area rugs, carpet, or multiple flooring types, choosing the right combination of vacuum and attachments is important.

    Pets Can Bring Even More Sand Indoors

    For many Pompano Beach homeowners, pets are part of the sand problem.

    Dogs in particular can bring sand into the house after walks, trips to the beach, time around the pool, or playing outdoors.

    Once that sand mixes with pet hair, vacuum maintenance becomes even more important.

    Pet hair can wrap around a brush roll while sand and fine dust collect throughout the vacuum. A vacuum designed for pet hair and equipped with appropriate attachments can make frequent cleanup easier.

    If you have pets and live in a home with a lot of hard flooring, a combination of a good bare-floor tool and a pet-focused attachment may be particularly useful.

    Don’t Forget About Your Central Vacuum System

    Central vacuum systems can be an excellent option for larger homes, but they still require maintenance.

    If you’re frequently picking up sand and fine dust, pay attention to the condition of the central vacuum’s bag or dirt container and filters.

    The hose and floor attachments should also be checked if you notice a sudden decrease in pickup.

    A clog doesn’t necessarily mean the main power unit has failed.

    Sometimes the problem is in the hose, wand, floor tool, inlet, or tubing.

    If only one inlet has poor suction, the problem may be localized. If suction is weak throughout the home, the power unit, filter, bag, tubing, or other components may need to be inspected.

    How Pompano Beach Homeowners Can Reduce Vacuum Wear

    You don’t have to eliminate every grain of sand from your home. Instead, a few simple habits can reduce how much work your vacuum has to do.

    Put Mats at Exterior Doors

    Good entry mats can catch some sand and dirt before it reaches the rest of the house.

    Consider mats near doors leading from garages, patios, pool areas, and other outdoor spaces.

    Create a Shoe-Free Area

    Shoes can carry a surprising amount of sand indoors. Keeping shoes near the entrance can help reduce the amount of outdoor debris reaching your floors.

    Shake Out Beach Towels Outside

    Beach towels can hold a lot of sand. Shaking them out outdoors before bringing them into the house can keep a significant amount of debris off your floors.

    Check the Vacuum Regularly

    Don’t wait for the vacuum to stop working before performing basic maintenance.

    Check the:

    • Filter

    • Bag or dirt container

    • Brush roll

    • Belt

    • Hose

    • Floor attachments

    • Wheels

    • Electrical cord

    Small maintenance issues are generally easier to address before they become larger problems.

    What Should You Look for When Buying a Vacuum for Sand?

    If you’re replacing an older vacuum, think about the environment where you’ll be using it.

    For a Pompano Beach home, useful features may include effective filtration, good airflow, appropriate dirt capacity, easy maintenance, and attachments designed for different flooring types.

    You may also want to consider:

    Strong Filtration

    Fine dust requires effective filtration. A vacuum that can maintain good airflow as it collects fine particles can be helpful in homes that see a lot of dust and sand.

    Easy Filter Maintenance

    Filters eventually collect dust. Look for a vacuum where routine filter maintenance is straightforward and replacement filters are readily available.

    Appropriate Floor Tools

    If your home has tile, hardwood, rugs, and carpet, look for a system with tools designed for those different surfaces.

    Good Dirt Capacity

    If you vacuum frequently, a larger bag or dirt container can reduce how often you have to stop and empty the machine.

    Pet Attachments

    If pets are part of the household, consider a vacuum with tools designed to handle pet hair.

    Replacement Parts

    A vacuum is easier to maintain when replacement bags, filters, belts, brushes, and other parts are readily available.

    When Sand Pickup Becomes a Vacuum Problem

    Frequent sand pickup is normal in South Florida, but repeated performance problems shouldn’t be ignored.

    If your vacuum suddenly has weak suction, makes unusual noises, smells like it’s overheating, or repeatedly clogs, it may be time to have it checked.

    The same applies if your vacuum is leaving noticeable amounts of sand behind even after multiple passes.

    A professional vacuum inspection can help determine whether the problem is a clogged hose, dirty filter, worn belt, brush-roll issue, airflow restriction, or another mechanical problem.

    For central vacuum systems, professional service can also help identify problems with the power unit, tubing, inlets, hoses, and attachments.

    Gator Vacuum & Sewing Can Help

    South Florida living is hard on vacuums. Between beach sand, pool areas, patios, pets, shoes, garages, and fine household dust, your vacuum may see considerably more use than you realize.

    The good news is that the right vacuum and the right maintenance routine can make a big difference.

    Gator Vacuum & Sewing helps homeowners with vacuum sales, parts, bags, filters, attachments, maintenance, and repairs. Whether you’re looking for a vacuum that can handle tile and rugs, need better tools for pet hair and sand, or have a central vacuum system that isn’t performing the way it should, getting the right equipment can make every day cleaning much easier.

    If sand seems to be taking over your Pompano Beach home—or your vacuum is struggling to keep up—stop by Gator Vacuum & Sewing for help finding the right cleaning solution for your floors and lifestyle.
    Sand and fine dust can put extra stress on filters, brush rolls, hoses, and other vacuum components. If your machine is losing suction or leaving sand behind even after routine maintenance, our vacuum repair services can help identify the underlying problem.
    A vacuum that runs hotter, clogs frequently, or struggles with fine debris may have an airflow restriction or worn component. Gator Vacuum & Sewing provides professional vacuum repair in Pompano Beach for homeowners dealing with sand, dust, pet hair, and performance issues.
    If cleaning the filter, emptying the bag, and checking the brush roll do not restore performance, professional inspection may be the next step. Visit our vacuum repair service page to learn more about repair options for upright, canister, and central vacuum systems.

  • Vacuum Brush Roll Not Spinning? Powerhead Problems in Davie

    Vacuum Brush Roll Not Spinning? Powerhead Problems in Davie

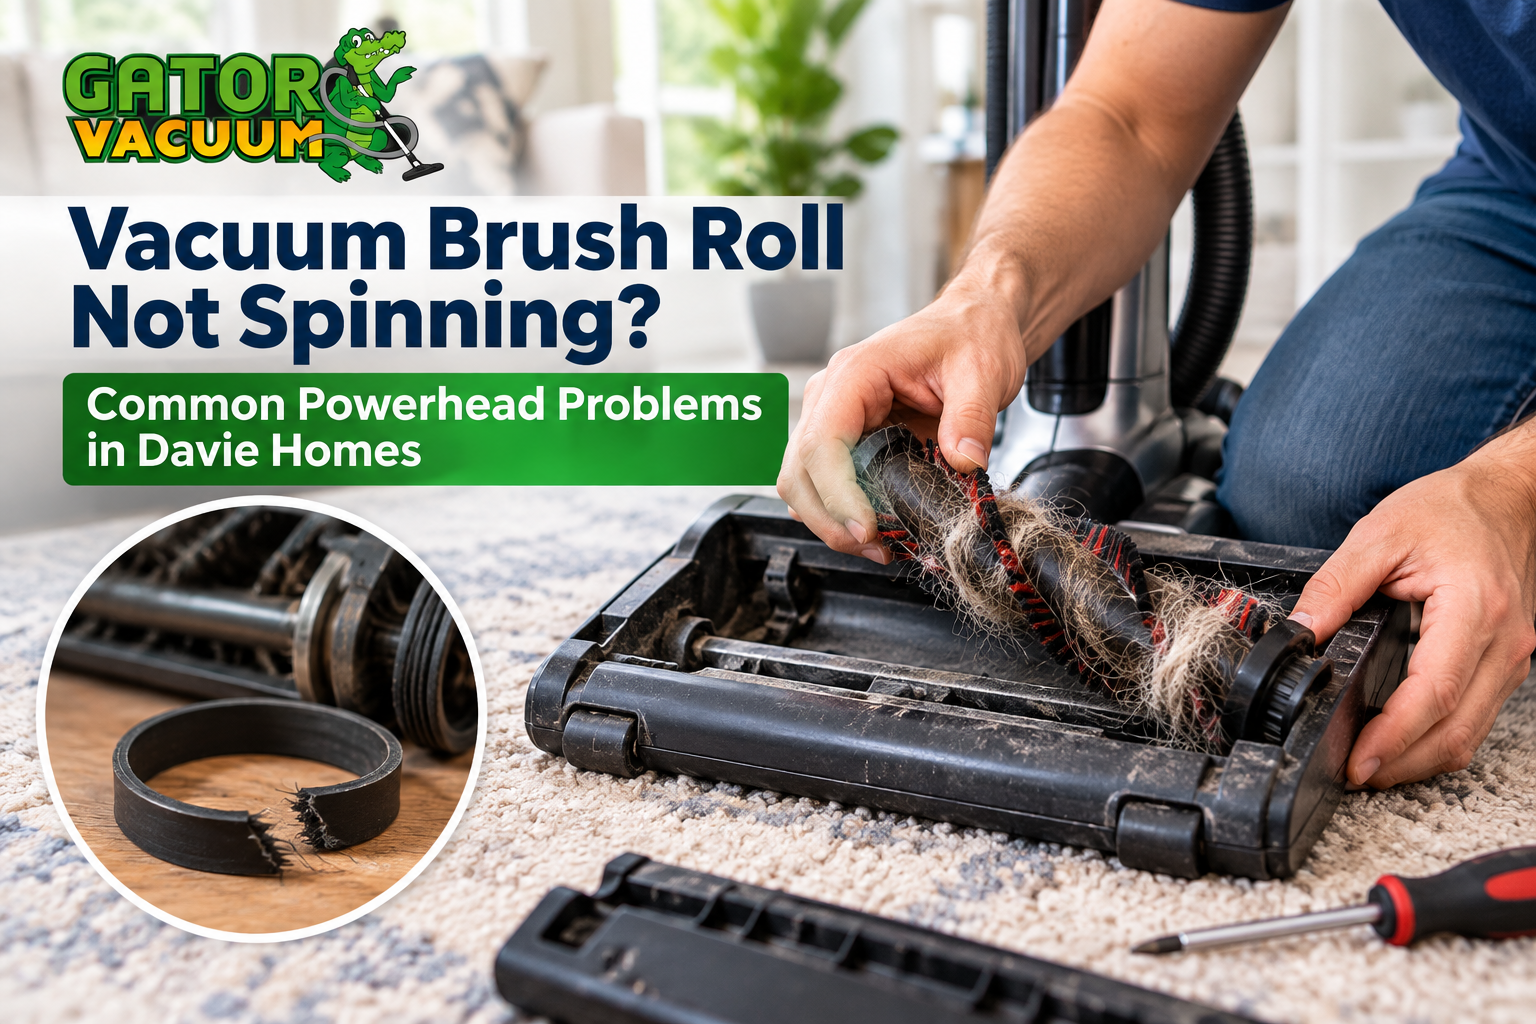
    Vacuum Brush Roll Not Spinning? Common Powerhead Problems in Davie Homes

    If your vacuum still has strong suction but your carpet suddenly is not getting clean, the problem may not be the vacuum motor or central vacuum system at all. In many cases, the real culprit is the powerhead brush roll.

    A vacuum powerhead is designed to do more than simply move across the floor. The rotating brush roll, powered by a separate motor or belt system depending on the powerhead design, agitates carpet fibers and helps loosen dirt, pet hair, dust, and debris so the vacuum can remove it more effectively.

    When the vacuum brush roll stops spinning, your vacuum may continue to run and still have excellent suction. However, cleaning performance can drop dramatically, especially on carpet.

    For homeowners in Davie, Florida, understanding the most common powerhead problems can help you determine whether your vacuum needs a simple cleaning, a replacement part, or professional vacuum repair.

    At Gator Vacuum & Sewing, we help homeowners troubleshoot and repair vacuum cleaners, central vacuum accessories, powerheads, hoses, and related components. If your powerhead has stopped working properly, the issue may be easier to fix than you think.

    What Does the Brush Roll Do?

    The brush roll is one of the most important components inside a powered vacuum head.

    As you push the powerhead across carpet, the brush roll spins rapidly. Bristles, agitators, or brush strips work their way through the carpet fibers to loosen debris. The vacuum’s suction then carries that loosened debris through the airflow system.

    This combination of agitation and suction is especially important for:

    • Carpeted bedrooms

    • Living rooms

    • Area rugs

    • Pet hair

    • Ground-in dirt

    • Fine debris trapped between carpet fibers

    • High-traffic areas

    When the brush roll stops spinning, the vacuum may sound like it is operating normally. You may even notice that the suction at the hose is still strong.

    But if the brush roll is not rotating, the powerhead is not doing its part.

    That is why one of the most common complaints we hear is:

    “My vacuum has suction, but it isn’t picking up the dirt like it used to.”

    In many cases, the powerhead is the first place to investigate.

    1. Hair and Debris Wrapped Around the Brush Roll

    One of the simplest—and most common—reasons a brush roll stops spinning is hair buildup.

    Long hair, pet hair, thread, string, carpet fibers, and other debris can become tightly wrapped around the ends of the brush roll. Over time, the buildup can create enough resistance to slow the brush roll or stop it completely.

    This is particularly common in homes with:

    • Dogs

    • Cats

    • Long-haired family members

    • Multiple pets

    • High-pile carpeting

    Hair may also wrap around the brush-roll bearings or end caps rather than simply collecting in the middle of the brush.

    If the brush roll is difficult to turn by hand when the powerhead is disconnected from the vacuum, debris may be preventing it from moving properly.

    Regularly checking and cleaning the brush roll can help prevent unnecessary wear.

    However, if the brush roll has already become damaged or the bearings have seized, cleaning alone may not solve the problem.

    2. A Stretched or Broken Powerhead Belt

    Some powered vacuum heads use a belt to transfer power from the motor to the brush roll.

    Over time, belts can stretch, crack, become brittle, or break.

    A stretched belt may allow the brush roll to turn, but not at the proper speed. In other cases, the brush roll may start spinning and then stop when it encounters resistance from carpet.

    A completely broken belt will usually result in a brush roll that does not move at all.

    You may hear the powerhead motor running while the brush remains stationary.

    That is a classic indication that the powerhead belt may be broken, stretched, or slipping.

    Replacing the belt can sometimes restore the powerhead to proper operation. However, it is important to use the correct belt for the specific powerhead. Installing the wrong belt can result in poor performance or premature failure.

    3. Worn Brush Roll Bearings

    The brush roll needs to rotate smoothly.

    At each end of the brush roll are components that allow it to rotate. Depending on the design, these may include bearings, bushings, end caps, or other supports.

    Over time, these components can wear out.

    When a brush-roll bearing begins to fail, you may notice:

    • A grinding sound

    • A squealing noise

    • Increased vibration

    • A brush roll that turns unevenly

    • The brush roll becoming difficult to turn

    • The powerhead shutting down when the brush encounters carpet

    A worn bearing can also put additional stress on the belt and powerhead motor.

    If you continue using the powerhead while the brush roll is binding, you may turn what could have been a relatively simple repair into a larger problem.

    4. Electrical Connection Problems

    Powered vacuum heads require electricity to operate the brush-roll motor.

    Depending on your vacuum system, power may travel through the hose, wand, electrical contacts, wiring, or connections inside the powerhead.

    A poor electrical connection can cause intermittent operation.

    For example, your powerhead may:

    • Work sometimes and stop other times

    • Start when the handle is moved into a certain position

    • Stop when the hose or wand moves

    • Have no brush-roll motor activity

    • Work briefly and then shut off

    Dirty, worn, loose, or damaged electrical contacts can interfere with the flow of electricity.

    This is one reason it is important not to immediately assume that a failed brush roll means the entire powerhead needs to be replaced.

    The problem could be an electrical connection, switch, wiring issue, or another replaceable component.

    5. A Failed Powerhead Switch

    Many powered vacuum heads have a switch that controls the brush-roll motor.

    A worn switch can eventually fail due to repeated use.

    If the switch no longer makes reliable electrical contact, the brush roll may not turn even though the vacuum itself continues to operate.

    A switch problem may be more likely if the powerhead has been used frequently for many years.

    You may notice that the powerhead works intermittently or that the brush roll starts and stops unexpectedly.

    Before replacing the entire powerhead, it can be worthwhile to have the switch and electrical circuit inspected.

    6. Powerhead Motor Problems

    The brush roll is typically driven by a motor inside the powerhead.

    Like any electric motor, it can eventually wear out.

    A failing powerhead motor may produce unusual noises, become excessively hot, operate intermittently, or fail to run at all.

    Motor problems can sometimes be caused by excessive resistance from a jammed brush roll. If hair and debris prevent the brush from rotating, the motor may have to work much harder than it was designed to.

    Over time, this additional load can contribute to motor wear.

    If the brush roll is clean, the belt is intact, the electrical connections appear normal, and the switch is functioning, the motor may need further testing.

    Depending on the powerhead, replacing the motor or another internal component may be possible.

    7. The Brush Roll Itself May Be Worn Out

    Sometimes the problem isn’t that the brush roll has stopped spinning.

    Instead, the brush roll may be spinning but no longer cleaning effectively.

    Brush strips and bristles wear down over time. The brush roll can also become damaged, bent, cracked, or worn at the ends.

    When the bristles become significantly worn, they may no longer agitate carpet effectively.

    This can be especially noticeable in homes with heavy carpet traffic.

    You may find that:

    • The brush roll spins but doesn’t pick up embedded debris

    • Carpet doesn’t look as clean after vacuuming

    • Pet hair remains behind

    • The vacuum needs multiple passes over the same area

    • The brush roll appears visibly worn

    Replacing a worn brush roll may restore the cleaning performance of the powerhead without requiring replacement of the entire unit.

    8. The Powerhead May Be Clogged

    While most people think about clogs inside the vacuum hose, the powerhead itself can also become obstructed.

    Debris can accumulate around the brush roll, intake opening, belt area, or other internal passages.

    A clog can restrict airflow and increase the load on the brush-roll system.

    If your powerhead suddenly becomes louder, stops spinning, or begins overheating, inspect it for visible obstructions.

    Always disconnect the powerhead from the vacuum system before attempting to remove debris or inspect moving components.

    How to Tell What Is Wrong With Your Powerhead

    If your vacuum brush roll is not spinning, start with a few basic observations.

    Check #1: Is the vacuum itself running?

    If the vacuum motor is running and you still have suction, the issue may be isolated to the powerhead.

    Check #2: Is the brush roll completely stationary?

    If the powerhead motor is running but the brush roll isn’t moving, a belt or mechanical problem may be responsible.

    Check #3: Does the brush roll turn freely?

    With the powerhead disconnected, carefully check whether the brush roll can rotate normally.

    If it is difficult to turn, look for wrapped hair, debris, or possible bearing problems.

    Check #4: Do you hear unusual noises?

    Grinding, squealing, clicking, or burning smells can indicate a mechanical or electrical problem.

    Check #5: Does the powerhead work intermittently?

    Intermittent operation can point toward a switch, electrical connection, wiring, or motor problem.

    Should You Replace the Powerhead or Repair It?

    This is a common question from homeowners.

    The answer depends on the condition and design of the powerhead.

    If the powerhead housing, motor, and major components are in good condition, replacing a belt, brush roll, switch, bearing, or other individual component may be a practical repair.

    However, if multiple components have failed or the powerhead is severely worn, replacement may make more sense.

    A professional inspection can help determine which option provides the best value.

    At Gator Vacuum & Sewing, we can help you identify the source of the problem and determine whether you need a vacuum powerhead repair, replacement brush roll, belt, electrical component, or complete powerhead replacement.

    Don’t Ignore a Powerhead That Has Stopped Spinning

    It can be tempting to continue using a vacuum when the brush roll stops working because the vacuum still has suction.

    But suction alone does not provide the same carpet-cleaning action as a properly functioning powered brush roll.

    A powerhead that is struggling to turn can also place additional stress on its belt, motor, bearings, and other components.

    Addressing the problem early may help prevent additional damage.

    For Davie homeowners, getting the right replacement part can also be important. Vacuum powerheads are not universal, and different models can use different brush rolls, belts, motors, electrical connections, and switches.

    That is why identifying the exact powerhead and vacuum model is an important part of the repair process.

    Professional Vacuum Powerhead Repair in Davie

    When your vacuum brush roll is not spinning, don’t assume that your entire vacuum cleaner has failed.

    The problem may be as simple as tangled hair or a broken belt. It could also involve worn bearings, a faulty switch, electrical connections, a damaged brush roll, or a failing powerhead motor.

    The good news is that many powerhead problems can be diagnosed and repaired without replacing the entire vacuum system.

    Gator Vacuum & Sewing serves homeowners looking for help with vacuum repair, central vacuum accessories, powerheads, replacement parts, and related vacuum problems in Davie and surrounding South Florida communities.

    If your vacuum still has suction but your carpets aren’t getting clean, the brush roll and powerhead should be one of the first places to look.

    Whether you need a replacement brush roll, belt, powerhead component, or professional troubleshooting, getting the problem diagnosed correctly can help restore your vacuum’s cleaning performance and extend the life of your equipment.

    Is your vacuum brush roll not spinning? Bring your powerhead or vacuum to Gator Vacuum & Sewing for help identifying the problem and finding the right repair or replacement solution.

    If your vacuum has strong suction but the brush roll still is not spinning, the issue may be inside the powerhead rather than the main vacuum motor. Gator Vacuum & Sewing provides professional vacuum repair services for problems involving belts, brush rolls, motors, switches, and electrical connections.

    A powerhead that stops spinning, works intermittently, or makes unusual noises can sometimes be repaired without replacing the entire vacuum. Our vacuum repair in Davie service can help identify whether the problem is caused by hair buildup, a worn belt, damaged bearings, or another component.

    If basic cleaning does not restore the brush roll, it may be time for a professional inspection. Visit our vacuum repair service page to learn more about troubleshooting and repair options for vacuum cleaners, powerheads, and related components.

  • Vacuum Keeps Clogging? Common Causes & Fixes in Coral Springs

    Vacuum Keeps Clogging? Common Causes & Fixes in Coral Springs

    Why Does My Vacuum Keep Clogging? A Coral Springs Troubleshooting Guide

    If your vacuum keeps clogging, clearing the blockage only to have the problem return a few minutes, days, or weeks later, there may be more going on than a piece of debris stuck in the hose. Recurring vacuum clogs can be caused by pet hair, oversized debris, dirty filters, blocked hoses or wands, poorly fitting attachments, and restricted airflow.

    For Coral Springs homeowners, frequent clogging can become especially frustrating when you rely on your vacuum to keep up with pets, children, tile, hardwood, carpeting, and everyday household messes. Understanding what is causing the repeated blockage can help you determine whether the problem is simple maintenance or a sign that your vacuum needs professional repair.

    At Gator Vacuum & Sewing, we help homeowners troubleshoot and repair vacuum cleaners and central vacuum systems. If your vacuum continues to clog after you’ve cleared the obvious blockage, our technicians can inspect the machine and identify the underlying problem.

    Why Does My Vacuum Keep Clogging?

    A vacuum should be able to move dirt and debris through its airflow system without repeatedly becoming blocked. When clogging happens over and over, something may be restricting that airflow or causing debris to collect where it shouldn’t.

    Some of the most common causes include:

    • Excessive pet hair

    • Large or oversized debris

    • Dirty or clogged filters

    • Blocked vacuum hoses

    • Obstructions in the wand

    • Clogged brush rolls or floor heads

    • Attachments that do not fit properly

    • Airflow restrictions

    • Internal blockages

    • Damaged or deteriorated vacuum components

    The first step is finding out where the blockage is occurring.

    1. Pet Hair Can Cause Recurring Vacuum Clogs

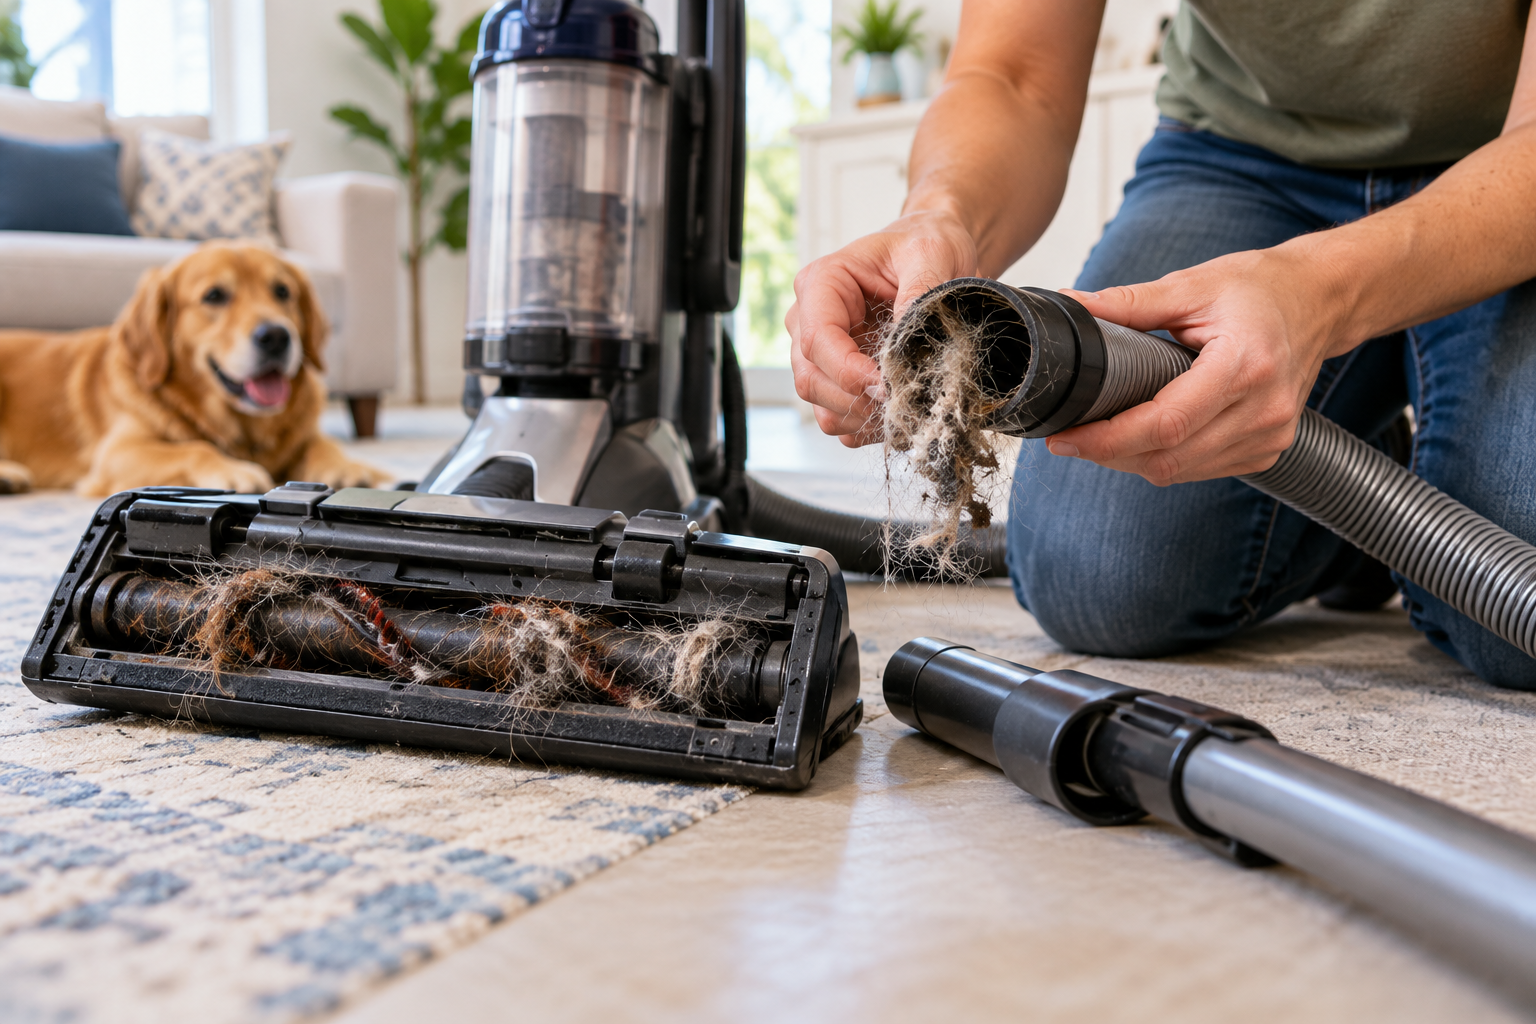
    Pet owners often deal with more frequent vacuum blockages. Dog and cat hair can collect inside hoses, wands, brush rolls, and floor attachments, especially when large amounts of hair are picked up at once.

    Long pet hair can wrap around a brush roll rather than traveling smoothly through the vacuum. Hair can also combine with dust, lint, and other debris to create a dense obstruction.

    If you have pets and your vacuum repeatedly clogs, check the brush roll and floor head for wrapped hair. Make sure the hose and wand are also free of accumulated debris.

    Regularly removing hair from the brush roll can help prevent larger blockages from developing.

    2. Oversized Debris May Be Blocking the Air Path

    Vacuum cleaners are designed to pick up dirt, dust, crumbs, hair, and other appropriately sized debris. They aren’t designed to swallow everything that happens to be on the floor.

    Small toys, paper, tissues, socks, plastic pieces, leaves, and other larger objects can become lodged inside a hose or wand.

    This is particularly common when vacuuming quickly or when children or pets have left objects on the floor.

    Before vacuuming, look for larger objects that could be accidentally pulled into the machine. If something has already become lodged inside the hose, continuing to run the vacuum can sometimes compact the obstruction farther into the airway.

    3. A Dirty Filter Can Reduce Airflow

    A vacuum filter that is heavily loaded with dust and debris can restrict airflow. When air cannot move through the vacuum properly, the machine may lose suction and become more prone to clogging.

    Check your vacuum’s filter according to the manufacturer’s maintenance recommendations. Depending on the model, the filter may need to be cleaned, washed, replaced, or serviced periodically.

    It’s important to use the correct filter for your particular vacuum. A filter that is damaged, incorrectly installed, or excessively dirty can affect the way the entire vacuum operates.

    If you’ve cleaned or replaced the filter but the vacuum still has poor airflow and repeatedly clogs, the filter may not be the actual source of the problem.

    4. Check the Vacuum Hose for Obstructions

    A blocked hose is one of the first things to check when a vacuum suddenly loses suction or repeatedly clogs.

    Disconnect the hose and inspect both ends. Look for visible debris and listen for unusual airflow restrictions. Hair, paper, toys, and compacted dirt can become lodged farther inside the hose where they aren’t immediately visible.

    A central vacuum hose can present a similar problem. If the power unit operates but suction at the hose is weak, there may be a blockage somewhere between the hose, wall inlet, tubing, or power unit.

    Do not assume the power unit is defective simply because the system isn’t picking up properly. The obstruction could be somewhere in the airflow path.

    5. Don’t Forget the Wand

    The wand is another common location for a blockage.

    If your vacuum uses a wand between the hose and floor attachment, disconnect the components and inspect the wand separately. A long, narrow wand can trap debris that is difficult to see from the outside.

    If suction is strong at the hose but becomes weak after the wand or floor attachment is connected, that can help narrow down where the restriction is located.

    Testing each section individually is often more useful than repeatedly running the complete vacuum and hoping the blockage clears itself.

    6. Check the Floor Head and Brush Roll

    Sometimes what looks like a hose clog is actually a blockage in the floor head.

    Hair, string, carpet fibers, and debris can accumulate around the brush roll. In some cases, the brush roll can become so packed with material that airflow and cleaning performance are affected.

    Inspect the underside of the floor head and remove accumulated debris. If the brush roll doesn’t rotate properly, makes unusual noises, or appears damaged, the problem may require more than routine cleaning.

    A damaged brush roll, belt, bearing, or other floor-head component can affect how well the vacuum moves debris through the cleaning path.

    7. Poorly Fitting Attachments Can Affect Airflow

    Vacuum attachments should fit securely and create a proper connection. If an attachment, wand, hose, or floor tool doesn’t fit correctly, air can escape from the connection.

    An attachment that is loose, cracked, damaged, or incorrectly matched to the vacuum can interfere with normal airflow.

    This can sometimes create a confusing situation where the vacuum appears to have a clog because cleaning performance is poor, when the actual issue is an airflow leak or improper connection.

    Check each connection point for cracks, looseness, damaged seals, or components that don’t seatproperly.

    8. Reduced Airflow Is an Important Clue

    Repeated clogging and reduced airflow often go hand in hand.

    If your vacuum is making an unusual sound, losing suction, overheating, or becoming clogged in the same location repeatedly, pay attention to the pattern. The location of the blockage can provide useful information about what’s happening inside the machine.

    For example, if the vacuum repeatedly clogs at the floor head, the problem may involve the brush roll or cleaning head. If the hose repeatedly becomes blocked, there could be an issue with the type of debris being picked up or an airflow restriction farther down the system.

    If the machine has poor suction everywhere, the cause may be more extensive.

    What If I Keep Clearing the Same Clog?

    If you clear a blockage and the exact same problem keeps happening, it’s worth looking beyond the debris itself.

    Repeated clogging can indicate:

    • A damaged or restricted hose

    • A blockage farther inside the vacuum

    • A dirty or incorrectly installed filter

    • A problem with the brush roll

    • An airflow restriction

    • A damaged attachment

    • A problem with the vacuum’s internal airflow system

    • A component that isn’t operating correctly

    At that point, repeatedly clearing the clog may only be treating the symptom.

    When Should You Have Your Vacuum Professionally Inspected?

    Not every vacuum clog requires a repair technician. Many simple blockages can be resolved at home with routine cleaning and maintenance.

    However, professional vacuum repair may be appropriate if:

    • Your vacuum repeatedly clogs after being thoroughly cleaned

    • Suction remains weak after clearing the hose

    • The vacuum overheats

    • You notice unusual noises or odors

    • The brush roll isn’t operating correctly

    • The same area repeatedly becomes blocked

    • The vacuum shuts off during use

    • The machine has poor airflow even with a clean filter

    • You suspect an internal obstruction

    • Your central vacuum system has weak suction at multiple inlets

    A technician can inspect the vacuum’s airflow path and components to determine whether the problem is a simple blockage or something requiring repair.

    What About Central Vacuum Systems?

    Recurring clogs can also happen with central vacuum systems.

    Because central vacuums use wall inlets and tubing installed throughout the home, a blockage isn’t necessarily located in the hose. An obstruction can occur at an inlet, inside the tubing, at a connection point, or near the power unit.

    If one central vacuum inlet has poor suction while other inlets work normally, that can provide an important clue that the restriction is localized.

    If every inlet has reduced suction, the problem may be closer to the power unit, filter, collection container, or main airflow system.

    Professional central vacuum repair can help locate restrictions that aren’t easily accessible to the homeowner.

    How to Help Prevent Vacuum Clogs

    A few simple maintenance habits can reduce the chance of recurring blockages.

    Empty the Vacuum Regularly

    Don’t allow the dirt container or bag to become excessively full. Follow your vacuum manufacturer’s recommendations for emptying or replacing it.

    Clean the Brush Roll

    If you have pets, inspect the brush roll regularly for hair, string, and carpet fibers.

    Maintain the Filter

    Clean or replace filters as recommended for your specific vacuum model.

    Avoid Vacuuming Large Objects

    Pick up toys, paper, plastic, clothing, and other oversized objects before vacuuming.

    Inspect Hoses and Wands

    If your vacuum’s suction suddenly changes, check the hose and wand before assuming the motor has failed.

    Use the Correct Attachments

    Make sure accessories are designed for your vacuum and fit securely.

    Don’t Let a Recurring Clog Turn Into a Bigger Vacuum Problem

    A single clog is usually just a maintenance issue. A vacuum that repeatedly clogs, loses airflow, overheats, or stops cleaning properly deserves more attention.

    If you’ve already cleared the hose, cleaned the filter, checked the brush roll, and inspected the attachments but your vacuum still keeps clogging, there may be an underlying airflow or mechanical problem.

    Gator Vacuum & Sewing provides vacuum repair and central vacuum service for homeowners in Coral Springs and surrounding South Florida communities. Our technicians can help diagnose recurring clogs, suction problems, airflow restrictions, and other vacuum issues.

    If your vacuum keeps clogging and you’re tired of clearing the same blockage over and over, bring it to Gator Vacuum & Sewing for professional troubleshooting and repair.

    Frequently Asked Questions About Vacuum Clogs

    Why does my vacuum keep clogging with pet hair?

    Pet hair can accumulate around the brush roll, inside hoses, and throughout the cleaning path. Long hair can also combine with dust and debris to create dense blockages. Regular brush-roll cleaning and filter maintenance can help, but persistent clogging may indicate an airflow restriction or component problem.

    Why does my vacuum lose suction after it gets clogged?

    A blockage restricts the movement of air through the vacuum. Even after removing the visible debris, additional material may remain farther inside the hose, wand, floor head, or internal airflow path.

    Why does my central vacuum keep clogging?

    Central vacuum systems can develop blockages in the hose, wall inlet, tubing, or near the power unit. If only one inlet has weak suction, the restriction may be localized. If suction is weak throughout the home, the problem may involve the main system.

    Can a dirty filter cause a vacuum to clog?

    Yes. A heavily loaded filter can restrict airflow and reduce vacuum performance. Follow the manufacturer’s instructions for cleaning or replacing the filter.

    When should I take my vacuum to a repair shop?

    Consider professional inspection if your vacuum continues to clog after routine maintenance, has persistent low suction, overheats, makes unusual noises, shuts off unexpectedly, or repeatedly develops a blockage in the same location.

    How can I prevent my vacuum from clogging?

    Empty the bag or dirt container regularly, maintain the filter, clean pet hair from the brush roll, remove large objects before vacuuming, and periodically inspect the hose, wand, and floor attachment for debris.

    Where can I get vacuum repair in Coral Springs?

    Gator Vacuum & Sewing provides vacuum repair services in Coral Springs and the surrounding area. If your vacuum has a recurring clog or another problem that basic maintenance isn’t resolving, professional troubleshooting can help identify the cause.

    If your vacuum continues to clog even after you’ve checked the hose, filter, and brush roll, the problem may require a closer inspection. Our vacuum repair services can help identify airflow restrictions, worn components, and other issues that basic cleaning may not resolve.

    A vacuum that repeatedly loses suction, overheats, or develops the same clog may be dealing with more than routine debris buildup. Gator Vacuum & Sewing offers professional vacuum repair in Coral Springs to diagnose the underlying cause and help restore proper performance.

    If you’ve already tried basic troubleshooting and the problem keeps returning, professional service can save you from repeatedly clearing the same blockage. Visit our vacuum repair service page to learn more about repair options for upright, canister, and other vacuum systems.

  • Central Vacuum Inlet Not Working? Weston Repair Guide

    Central Vacuum Inlet Not Working? Weston Repair Guide

    Central Vacuum Inlet Not Working? What Weston Homeowners Should Check First

    A central vacuum system can make cleaning your home much easier—until you plug the hose into a wall inlet and nothing happens.

    One of the most common situations homeowners experience is having several central vacuum inlets that work normally while one inlet appears completely dead. When this happens, the central vacuum power unit itself may still be working properly.

    If one central vacuum inlet is not working while the others are, the problem is often isolated to the wall inlet, low-voltage wiring, hose connection, electrical contacts, or the section of tubing serving that area of the home.

    For homeowners in Weston, Florida, there are several things you can check before assuming the entire central vacuum system needs to be replaced.

    Why Is My Central Vacuum Inlet Not Working?

    Central vacuum systems typically use several wall inlets connected through PVC tubing to a main central vacuum power unit.

    Many systems also use low-voltage wiring that tells the central vacuum motor when the hose has been connected.

    Because several components work together, a problem with one wall inlet does not automatically mean that your central vacuum motor has failed.

    Common causes of a central vacuum inlet not working include:

    • Loose low-voltage wiring
    • Damaged inlet valves
    • Worn electrical contacts
    • Poor hose connections
    • Localized tubing clogs
    • Air leaks
    • Faulty inlet switches
    • Damaged tubing
    • Loose fittings
    • Debris around the inlet door

    The first step is determining whether the issue affects one inlet or the entire system.

    Central Vacuum Inlet Not Working but Others Work

    If several wall inlets work correctly but one does not, that is an important troubleshooting clue.

    Test your central vacuum hose at several outlets around your home.

    For example, if you have six central vacuum inlets and five work normally while one bedroom inlet does nothing, the main vacuum unit is probably capable of operating.

    That means you should concentrate on the individual inlet, wiring, hose connection, or nearby tubing instead of immediately replacing the central vacuum power unit.

    Check the Central Vacuum Hose Connection

    Sometimes the wall inlet isn’t actually the problem.

    The hose may not be making proper contact with the electrical or low-voltage connections inside the inlet.

    Remove the hose and carefully reconnect it.

    Make sure it is inserted completely.

    Then test the same hose at another wall inlet.

    If the hose works perfectly at another location but doesn’t activate the system at one specific inlet, the problem is more likely related to that particular inlet or its wiring.

    If you have another compatible hose available, testing it can help eliminate the hose itself as the cause.

    Check for a Damaged Central Vacuum Wall Inlet

    Central vacuum inlet valves receive years of repeated use.

    Over time, an inlet can become:

    • Loose
    • Cracked
    • Worn
    • Damaged
    • Misaligned

    A damaged central vacuum inlet may cause symptoms such as:

    • Vacuum does not start
    • Hose does not stay connected
    • Inlet door does not close properly
    • Weak suction
    • Intermittent operation
    • Loose wall plate
    • Visible physical damage

    Fortunately, a defective wall inlet often can be replaced without replacing the entire central vacuum system.

    Check the Low-Voltage Wiring Behind the Inlet

    A common reason a central vacuum wall inlet fails to activate the motor is a problem with the low-voltage control wiring.

    The wiring tells the central vacuum power unit when the hose has been connected.

    If the wiring behind one inlet becomes loose, damaged, or disconnected, the motor may never receive the signal to turn on.

    Possible causes include:

    • Loose wiring connections
    • Aging wiring
    • Previous remodeling
    • Movement of the inlet
    • Improper installation
    • Damaged electrical contacts
    • Corrosion

    If you’re comfortable inspecting the inlet, you may be able to identify an obvious disconnected wire.

    More complicated electrical troubleshooting should be handled by someone familiar with central vacuum control circuits.

    Can One Central Vacuum Inlet Be Clogged?

    Yes.

    A central vacuum clog does not always affect every inlet in the home.

    If one inlet has very weak suction while other outlets have strong suction, there may be a blockage in the branch of tubing connected to that inlet.

    Common objects that can clog central vacuum tubing include:

    • Paper
    • Small toys
    • Socks
    • Hair
    • Large debris
    • Household objects accidentally vacuumed up

    A localized clog becomes especially likely when the problem appeared suddenly and only affects one area of the house.

    Central Vacuum Turns On but Has Weak Suction at One Inlet

    If the central vacuum motor turns on but one inlet has considerably less suction than the others, the activation circuit may be working correctly.

    Instead, investigate airflow problems.

    Possible causes include:

    • Clogged hose
    • Blocked wall inlet
    • Tubing obstruction
    • Air leak
    • Cracked fitting
    • Damaged pipe
    • Loose connection
    • Worn inlet gasket

    Compare the suction from the affected outlet with another working outlet.

    A noticeable difference can help distinguish an airflow problem from an electrical activation problem.

    Check for a Central Vacuum Air Leak

    Central vacuum systems depend on sealed tubing to maintain proper airflow.

    An air leak around an individual inlet or section of piping can significantly reduce suction.

    Possible leak locations include:

    • Wall inlet
    • Inlet gasket
    • Tubing connection
    • PVC fitting
    • Hidden tubing inside the wall

    You may hear a hissing sound near the inlet when the central vacuum is running.

    Because much of the tubing is hidden inside walls, professional diagnosis may be necessary when the leak cannot be easily located.

    Central Vacuum Inlet Has Suction but Won’t Turn On

    Another situation occurs when the airflow path appears clear but the vacuum does not activate when the hose is connected.

    This can indicate a problem with the control circuit rather than the tubing.

    Possible causes include:

    • Low-voltage wiring failure
    • Faulty inlet switch
    • Damaged contacts
    • Poor hose electrical connection

    If your hose activates the system from other wall inlets, the problem is more likely associated with the problem inlet.

    Why Does My Central Vacuum Inlet Work Intermittently?

    Pay attention to what happens when you move or reconnect the hose.

    If the vacuum:

    • Starts and stops
    • Works only when the hose is positioned a certain way
    • Activates after repeatedly reconnecting the hose

    you may have a loose electrical connection, worn contact, failing inlet switch, or hose connection problem.

    These symptoms can be particularly useful when diagnosing the system.

    Don’t Automatically Replace the Central Vacuum Motor

    A non-working wall inlet does not automatically mean the central vacuum power unit has failed.

    If several other outlets still operate normally, the power unit should generally not be the first component you suspect.

    Instead, investigate the affected wall inlet and its associated wiring and tubing first.

    Correctly identifying the source of the problem may prevent unnecessary replacement of an expensive central vacuum power unit.

    Repair or Replace a Central Vacuum Inlet?

    A defective central vacuum inlet does not normally mean the entire system needs to be replaced.

    Depending on the problem, the repair may involve:

    • Replacement inlet valve
    • Low-voltage wiring repair
    • New electrical contacts
    • Replacement inlet switch
    • New gasket
    • Tubing fitting
    • Hose connection
    • Replacement hose

    The correct replacement component depends on the type and age of the central vacuum system.

    Taking a photo of the existing inlet or identifying the manufacturer and model can make finding compatible replacement parts easier.

    When Should You Call for Central Vacuum Repair?

    Basic troubleshooting such as testing another outlet, reconnecting the hose, checking suction, and looking for obvious damage can often help narrow down the problem.

    Professional diagnosis becomes more useful when:

    • One inlet consistently fails
    • Several outlets suddenly stop working
    • The inlet works intermittently
    • One outlet has much weaker suction
    • You suspect a hidden pipe clog
    • Low-voltage wiring is damaged
    • The wall inlet is physically broken
    • You hear air leaking inside the wall
    • Replacing or testing the hose does not solve the issue

    Determining whether the problem is electrical, mechanical, or airflow-related can make the repair much more straightforward.

    Central Vacuum Repair in Weston, FL

    If you’ve completed the basic checks and your central vacuum inlet still isn’t working, professional diagnosis can help locate the problem without replacing components unnecessarily. Gator Vacuum & Sewing provides central vacuum repair in Weston, FL, including troubleshooting for wall inlets, low-voltage wiring, clogged tubing, hoses, suction problems, parts, and central vacuum power units.

    A technician can determine whether the failure is located at the inlet itself, inside the control wiring, within the hose connection, or farther inside the tubing system. This is particularly helpful when the piping or electrical connections are hidden behind walls and cannot be inspected easily.

    Need Central Vacuum Service or Repair in Weston?

    A central vacuum system that works from some wall inlets but not others usually gives you an important clue: the problem may be localized rather than affecting the entire system.

    Start by testing other inlets, checking your hose, comparing suction, and observing whether the motor activates.

    If the problem continues, Gator Vacuum & Sewing offers Weston central vacuum service and repair for homeowners dealing with non-working inlets, weak suction, wiring problems, clogged pipes, damaged hoses, inlet replacement, and other built-in vacuum system issues.

    Getting the specific problem diagnosed correctly can often be far more practical than replacing an entire central vacuum system.

  • Sewing Machine Won’t Feed Fabric? Common Causes & Repair in Weston, FL

    Sewing Machine Won’t Feed Fabric? Common Causes & Repair in Weston, FL

    Sewing Machine Won’t Feed Fabric? Feed Dog and Presser Foot Problems in Weston

    If your sewing machine turns on, the needle moves up and down, and the motor sounds like it is working—but your fabric barely moves or does not move at all—you may be dealing with a feed dog or presser foot problem.

    This is a common sewing machine issue that can be frustrating because the machine may appear to be functioning normally. You can hear the motor running and see the needle stitching, but instead of smoothly pulling the fabric through, the fabric stays in place, bunches underneath the presser foot, or requires you to manually pull it along.

    Fortunately, not every fabric-feeding problem means you need a major repair. Sometimes the cause is a simple stitch setting, lowered feed dogs, excessive lint, or incorrect presser-foot pressure. Other times, the problem can point to worn mechanical components, damaged gears, timing issues, or other internal problems that require professional sewing machine repair in Weston.

    What Are Feed Dogs on a Sewing Machine?

    The feed dogs are the small, textured metal teeth located underneath the presser foot and needle plate. Their job is to move the fabric forward as you sew.

    During a normal stitch, the feed dogs move through a specific sequence:

    1. They rise above the needle plate.

    2. They grip the bottom of the fabric.

    3. They move the fabric forward or backward.

    4. They drop below the needle plate.

    5. They return to their starting position.

    This movement happens repeatedly as the machine stitches.

    When the feed dogs are working correctly, you generally do not need to push or pull the fabric. The machine should move it at a consistent rate based on your stitch length.

    When the feed dogs are lowered, blocked by lint, damaged, worn, or not moving correctly, the fabric may stop feeding.

    Why Won’t My Sewing Machine Feed Fabric?

    There are several possible reasons your sewing machine is running but the fabric is not moving. Before assuming that the machine needs an expensive repair, it is worth checking a few basic things.

    1. The Feed Dogs May Be Lowered

    One of the first things to check is whether your feed dogs have accidentally been lowered.

    Many sewing machines have a feed-dog control used for free-motion sewing, quilting, darning, or embroidery. When the feed dogs are lowered, they no longer rise high enough to grip the fabric.

    The result can be exactly what many homeowners describe as:

    “My sewing machine works, but it won’t move the fabric.”

    Check your machine for a feed-dog lever, switch, or button. Depending on the model, it may be located on the front, side, or rear of the machine.

    If the feed dogs were intentionally lowered for free-motion sewing, return them to the normal sewing position.

    Some machines also require you to turn the handwheel one or more times before the feed dogs return to their normal position.

    2. The Feed Dogs May Be Dirty

    Sewing produces an impressive amount of lint.

    Fabric fibers, thread pieces, dust, and other debris can collect around the feed dogs and underneath the needle plate. Over time, this buildup can interfere with the feed dogs’ ability to move freely or grip the fabric.

    If you sew frequently, cleaning the feed-dog area should be part of your regular machine maintenance.

    Turn the machine off and remove the needle plate according to your machine’s instructions. Use an appropriate cleaning brush to remove accumulated lint and debris.

    Avoid forcing anything into the machine or using excessive compressed air where it could push debris deeper into the mechanism.

    If the feed dogs are clean but still do not move correctly, the problem may be mechanical rather than simply a cleaning issue.

    3. Your Stitch Length May Be Set Too Low

    Another surprisingly common cause is an incorrect stitch setting.

    If the stitch length is set extremely short or at zero, the machine may appear to be sewing without actually moving the fabric forward very much.

    Check your stitch-length control and make sure it is set appropriately for the type of sewing you are doing.

    For example, a standard medium-length stitch is often appropriate for general-purpose sewing, while heavier fabrics may require a different setting.

    If changing the stitch length makes no difference and the feed dogs are not moving properly, you may have a mechanical issue.

    4. The Presser Foot May Not Be Applying Enough Pressure

    The presser foot works together with the feed dogs to move fabric through the machine.

    The feed dogs grip the underside of the fabric while the presser foot holds the fabric against them. If the presser-foot pressure is too low, the feed dogs may have difficulty moving the material.

    This can be especially noticeable with:

    • Lightweight fabrics

    • Slippery fabrics

    • Multiple layers of fabric

    • Thick materials

    • Quilting projects

    • Specialty fabrics

    Some sewing machines allow the presser-foot pressure to be adjusted. If yours has this feature, the setting may need to be changed for the particular fabric you are sewing.

    However, avoid randomly adjusting internal or mechanical settings. If the presser foot does not appear to be applying normal pressure, a technician can determine whether the issue is adjustment-related or caused by worn components.

    5. Lint or Thread May Be Blocking the Mechanism

    A sewing machine has many moving components underneath the needle plate and inside the machine.

    A small amount of lint may not cause a noticeable problem. Over time, however, accumulated lint and thread can interfere with moving parts.

    You might notice:

    • Feed dogs moving unevenly

    • Fabric feeding intermittently

    • Stitch length becoming inconsistent

    • A clicking or grinding sound

    • The machine struggling to sew thicker materials

    • Fabric getting stuck under the presser foot

    Regular cleaning can help prevent these problems, but excessive buildup may require a morethorough cleaning and service.

    6. The Feed Dogs May Be Worn or Damaged

    Feed dogs are designed to grip fabric, but they are not immune to wear.

    After years of use, the teeth can become worn or damaged. If the teeth have become smooth, they may no longer grip the fabric effectively.

    This can make the machine seem as though it has lost its ability to feed fabric.

    A damaged feed dog can also cause inconsistent stitching. You may notice that the machine feeds normally in some areas but struggles with certain fabrics or stitch lengths.

    If the feed dogs are visibly damaged or unusually worn, replacement may be necessary.

    7. Internal Gears Could Be Damaged

    The feed dogs do not move independently. Their movement is controlled by a series of mechanical components inside the sewing machine.

    Depending on the machine’s design, gears, cams, shafts, and other components work together to create the precise motion required to feed the fabric.

    If an internal gear becomes damaged or worn, the machine may still run while the feed mechanism does not operate correctly.

    This is one reason a sewing machine can sound perfectly normal while failing to move fabric.

    A damaged gear is not usually something that can be fixed from the outside. Diagnosing the problem may require disassembly and inspection by an experienced sewing machine technician.

    8. Sewing Machine Timing May Be Off

    Timing is extremely important inside a sewing machine.

    The needle, hook, feed dogs, and other components have to move in a precise sequence. If the timing becomes incorrect, the machine may develop several symptoms at once.

    A timing problem can sometimes cause:

    • Poor fabric feeding

    • Skipped stitches

    • Needle strikes

    • Thread breaking

    • Incorrect stitch formation

    • Unusual noises

    • Inconsistent stitch length

    If your sewing machine recently jammed, hit a hard object, broke a needle, or experienced another mechanical incident and then stopped feeding fabric correctly, timing or another internal mechanical problem could be involved.

    9. The Machine May Need Internal Mechanical Service

    If you’ve checked the feed-dog setting, cleaned the machine, confirmed the stitch length, and checked the presser foot but the fabric still will not feed, it may be time for professional service.

    Internal mechanical wear can develop gradually. Older machines may experience wear in gears, shafts, linkages, bearings, or other components that affect fabric feeding.

    Sometimes the machine gives you warning signs before the problem becomes severe.

    Pay attention if your machine has recently started:

    • Making unusual noises

    • Feeding fabric inconsistently

    • Producing uneven stitches

    • Running slower than normal

    • Getting stuck during certain stitches

    • Struggling with thicker fabrics

    • Requiring you to pull the fabric through manually

    These symptoms can help a sewing machine technician determine where to begin troubleshooting.

    Should You Pull the Fabric Through Yourself?

    It may be tempting to simply pull the fabric when the machine stops feeding.

    Try not to.

    Pulling fabric aggressively while the needle is engaged can place unnecessary stress on the needle, presser foot, feed mechanism, and other components. It can also contribute to needle breakage or damage to the fabric.

    The sewing machine should normally control the fabric movement. Your job is primarily to guide the material—not force it through the machine.

    If you consistently have to push or pull the fabric, there is likely an underlying problem that should be addressed.

    When to Bring Your Sewing Machine in for Repair

    A simple setting adjustment or cleaning may solve some feeding problems. But if the feed dogs are not moving, the presser foot is not applying proper pressure, or the machine is makingunusual noises, professional inspection is a better option.

    This is especially true if you have an expensive sewing machine, computerized sewing machine, embroidery machine, or machine that has significant sentimental or professional value.

    A technician can inspect the feed dogs, presser-foot mechanism, stitch controls, gears, timing, and other components to identify the actual cause of the problem.

    Trying to disassemble a sewing machine without knowing how its internal mechanisms work can turn a relatively simple repair into a much more complicated one.

    Sewing Machine Repair in Weston, FL

    If your sewing machine is running but won’t feed fabric, you don’t necessarily need to replace the machine.

    The problem could be something as simple as lowered feed dogs or a stitch setting. It could also be caused by lint buildup, incorrect presser-foot pressure, worn feed dogs, damaged gears, timing problems, or normal mechanical wear.

    The important thing is to identify the cause before continuing to sew and potentially making the problem worse.

    For homeowners and sewing enthusiasts in Weston, Florida, professional sewing machine repair can help get your machine feeding fabric smoothly again. A proper inspection can determine whether the issue is a simple adjustment, cleaning, replacement part, or more involved mechanical repair.

    Common Sewing Machine Feeding Problems We Can Help Diagnose

    If your machine is experiencing any of these problems, it may be time for service:

    • Sewing machine runs but won’t move fabric

    • Fabric barely moves while sewing

    • Feed dogs aren’t moving

    • Feed dogs won’t rise

    • Fabric gets stuck under the presser foot

    • Sewing machine stitches in place

    • Stitch length is inconsistent

    • Presser foot isn’t holding fabric properly

    • Machine skips stitches while feeding

    • Fabric bunches underneath the needle

    • Machine makes unusual noises while sewing

    • Feed mechanism works intermittently

    Don’t assume that a sewing machine that won’t feed fabric has reached the end of its useful life. Many feeding problems are repairable, and diagnosing the problem early can help prevent additional damage.

    If your sewing machine runs but your fabric isn’t moving the way it should, professional sewing machine repair in Weston can help determine what’s preventing the feed system from doing its job.

    If your sewing machine still will not feed fabric after checking the feed dogs, stitch length, presser foot, and visible lint buildup, the problem may involve worn gears, timing issues, or another internal component. For local service, learn more about our sewing machine repair in Weston, FL and the types of problems our technicians can diagnose.

    Different sewing machine brands can develop different feeding and mechanical issues. If you own a Singer machine that is skipping stitches, making unusual noises, or failing to move fabric properly, visit our Singer sewing machine repair page for more information about professional service and troubleshooting.

    Brother sewing machines can also experience feed problems related to the presser foot, feed mechanism, stitch settings, or internal components. Owners experiencing these issues can learn more about our Brother sewing machine repair services and available diagnostic options.

    If basic troubleshooting does not solve the problem, professional inspection can help identify the cause before additional wear develops. Our Weston sewing machine repair service can help determine whether your machine needs cleaning, adjustment, replacement parts, or more extensive mechanical repair.