

Why Does My Vacuum Keep Clogging? A Coral Springs Troubleshooting Guide
If your vacuum keeps clogging, clearing the blockage only to have the problem return a few minutes, days, or weeks later, there may be more going on than a piece of debris stuck in the hose. Recurring vacuum clogs can be caused by pet hair, oversized debris, dirty filters, blocked hoses or wands, poorly fitting attachments, and restricted airflow.
For Coral Springs homeowners, frequent clogging can become especially frustrating when you rely on your vacuum to keep up with pets, children, tile, hardwood, carpeting, and everyday household messes. Understanding what is causing the repeated blockage can help you determine whether the problem is simple maintenance or a sign that your vacuum needs professional repair.
At Gator Vacuum & Sewing, we help homeowners troubleshoot and repair vacuum cleaners and central vacuum systems. If your vacuum continues to clog after you’ve cleared the obvious blockage, our technicians can inspect the machine and identify the underlying problem.
Why Does My Vacuum Keep Clogging?
A vacuum should be able to move dirt and debris through its airflow system without repeatedly becoming blocked. When clogging happens over and over, something may be restricting that airflow or causing debris to collect where it shouldn’t.
Some of the most common causes include:
• Excessive pet hair
• Large or oversized debris
• Dirty or clogged filters
• Blocked vacuum hoses
• Obstructions in the wand
• Clogged brush rolls or floor heads
• Attachments that do not fit properly
• Airflow restrictions
• Internal blockages
• Damaged or deteriorated vacuum components
The first step is finding out where the blockage is occurring.
1. Pet Hair Can Cause Recurring Vacuum Clogs
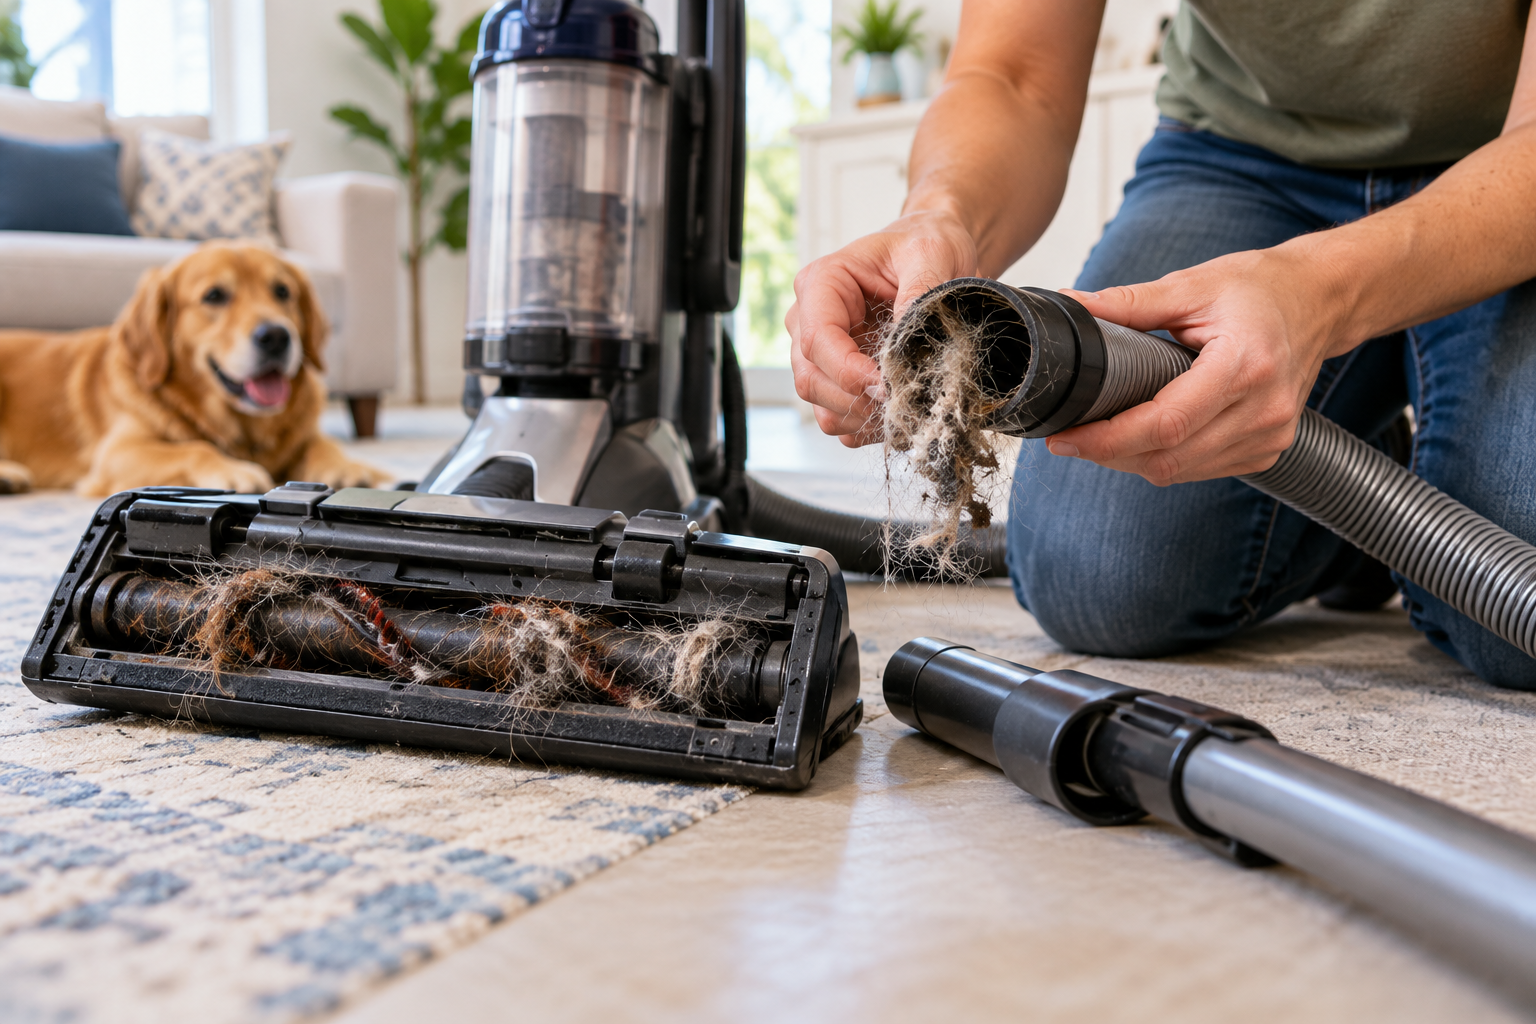
Pet owners often deal with more frequent vacuum blockages. Dog and cat hair can collect inside hoses, wands, brush rolls, and floor attachments, especially when large amounts of hair are picked up at once.
Long pet hair can wrap around a brush roll rather than traveling smoothly through the vacuum. Hair can also combine with dust, lint, and other debris to create a dense obstruction.
If you have pets and your vacuum repeatedly clogs, check the brush roll and floor head for wrapped hair. Make sure the hose and wand are also free of accumulated debris.
Regularly removing hair from the brush roll can help prevent larger blockages from developing.
2. Oversized Debris May Be Blocking the Air Path
Vacuum cleaners are designed to pick up dirt, dust, crumbs, hair, and other appropriately sized debris. They aren’t designed to swallow everything that happens to be on the floor.
Small toys, paper, tissues, socks, plastic pieces, leaves, and other larger objects can become lodged inside a hose or wand.
This is particularly common when vacuuming quickly or when children or pets have left objects on the floor.
Before vacuuming, look for larger objects that could be accidentally pulled into the machine. If something has already become lodged inside the hose, continuing to run the vacuum can sometimes compact the obstruction farther into the airway.
3. A Dirty Filter Can Reduce Airflow
A vacuum filter that is heavily loaded with dust and debris can restrict airflow. When air cannot move through the vacuum properly, the machine may lose suction and become more prone to clogging.
Check your vacuum’s filter according to the manufacturer’s maintenance recommendations. Depending on the model, the filter may need to be cleaned, washed, replaced, or serviced periodically.
It’s important to use the correct filter for your particular vacuum. A filter that is damaged, incorrectly installed, or excessively dirty can affect the way the entire vacuum operates.
If you’ve cleaned or replaced the filter but the vacuum still has poor airflow and repeatedly clogs, the filter may not be the actual source of the problem.
4. Check the Vacuum Hose for Obstructions
A blocked hose is one of the first things to check when a vacuum suddenly loses suction or repeatedly clogs.
Disconnect the hose and inspect both ends. Look for visible debris and listen for unusual airflow restrictions. Hair, paper, toys, and compacted dirt can become lodged farther inside the hose where they aren’t immediately visible.
A central vacuum hose can present a similar problem. If the power unit operates but suction at the hose is weak, there may be a blockage somewhere between the hose, wall inlet, tubing, or power unit.
Do not assume the power unit is defective simply because the system isn’t picking up properly. The obstruction could be somewhere in the airflow path.
5. Don’t Forget the Wand
The wand is another common location for a blockage.
If your vacuum uses a wand between the hose and floor attachment, disconnect the components and inspect the wand separately. A long, narrow wand can trap debris that is difficult to see from the outside.
If suction is strong at the hose but becomes weak after the wand or floor attachment is connected, that can help narrow down where the restriction is located.
Testing each section individually is often more useful than repeatedly running the complete vacuum and hoping the blockage clears itself.
6. Check the Floor Head and Brush Roll
Sometimes what looks like a hose clog is actually a blockage in the floor head.
Hair, string, carpet fibers, and debris can accumulate around the brush roll. In some cases, the brush roll can become so packed with material that airflow and cleaning performance are affected.
Inspect the underside of the floor head and remove accumulated debris. If the brush roll doesn’t rotate properly, makes unusual noises, or appears damaged, the problem may require more than routine cleaning.
A damaged brush roll, belt, bearing, or other floor-head component can affect how well the vacuum moves debris through the cleaning path.
7. Poorly Fitting Attachments Can Affect Airflow
Vacuum attachments should fit securely and create a proper connection. If an attachment, wand, hose, or floor tool doesn’t fit correctly, air can escape from the connection.
An attachment that is loose, cracked, damaged, or incorrectly matched to the vacuum can interfere with normal airflow.
This can sometimes create a confusing situation where the vacuum appears to have a clog because cleaning performance is poor, when the actual issue is an airflow leak or improper connection.
Check each connection point for cracks, looseness, damaged seals, or components that don’t seatproperly.
8. Reduced Airflow Is an Important Clue
Repeated clogging and reduced airflow often go hand in hand.
If your vacuum is making an unusual sound, losing suction, overheating, or becoming clogged in the same location repeatedly, pay attention to the pattern. The location of the blockage can provide useful information about what’s happening inside the machine.
For example, if the vacuum repeatedly clogs at the floor head, the problem may involve the brush roll or cleaning head. If the hose repeatedly becomes blocked, there could be an issue with the type of debris being picked up or an airflow restriction farther down the system.
If the machine has poor suction everywhere, the cause may be more extensive.
What If I Keep Clearing the Same Clog?
If you clear a blockage and the exact same problem keeps happening, it’s worth looking beyond the debris itself.
Repeated clogging can indicate:
• A damaged or restricted hose
• A blockage farther inside the vacuum
• A dirty or incorrectly installed filter
• A problem with the brush roll
• An airflow restriction
• A damaged attachment
• A problem with the vacuum’s internal airflow system
• A component that isn’t operating correctly
At that point, repeatedly clearing the clog may only be treating the symptom.
When Should You Have Your Vacuum Professionally Inspected?
Not every vacuum clog requires a repair technician. Many simple blockages can be resolved at home with routine cleaning and maintenance.
However, professional vacuum repair may be appropriate if:
• Your vacuum repeatedly clogs after being thoroughly cleaned
• Suction remains weak after clearing the hose
• The vacuum overheats
• You notice unusual noises or odors
• The brush roll isn’t operating correctly
• The same area repeatedly becomes blocked
• The vacuum shuts off during use
• The machine has poor airflow even with a clean filter
• You suspect an internal obstruction
• Your central vacuum system has weak suction at multiple inlets
A technician can inspect the vacuum’s airflow path and components to determine whether the problem is a simple blockage or something requiring repair.
What About Central Vacuum Systems?
Recurring clogs can also happen with central vacuum systems.
Because central vacuums use wall inlets and tubing installed throughout the home, a blockage isn’t necessarily located in the hose. An obstruction can occur at an inlet, inside the tubing, at a connection point, or near the power unit.
If one central vacuum inlet has poor suction while other inlets work normally, that can provide an important clue that the restriction is localized.
If every inlet has reduced suction, the problem may be closer to the power unit, filter, collection container, or main airflow system.
Professional central vacuum repair can help locate restrictions that aren’t easily accessible to the homeowner.
How to Help Prevent Vacuum Clogs
A few simple maintenance habits can reduce the chance of recurring blockages.
Empty the Vacuum Regularly
Don’t allow the dirt container or bag to become excessively full. Follow your vacuum manufacturer’s recommendations for emptying or replacing it.
Clean the Brush Roll
If you have pets, inspect the brush roll regularly for hair, string, and carpet fibers.
Maintain the Filter
Clean or replace filters as recommended for your specific vacuum model.
Avoid Vacuuming Large Objects
Pick up toys, paper, plastic, clothing, and other oversized objects before vacuuming.
Inspect Hoses and Wands
If your vacuum’s suction suddenly changes, check the hose and wand before assuming the motor has failed.
Use the Correct Attachments
Make sure accessories are designed for your vacuum and fit securely.
Don’t Let a Recurring Clog Turn Into a Bigger Vacuum Problem
A single clog is usually just a maintenance issue. A vacuum that repeatedly clogs, loses airflow, overheats, or stops cleaning properly deserves more attention.
If you’ve already cleared the hose, cleaned the filter, checked the brush roll, and inspected the attachments but your vacuum still keeps clogging, there may be an underlying airflow or mechanical problem.
Gator Vacuum & Sewing provides vacuum repair and central vacuum service for homeowners in Coral Springs and surrounding South Florida communities. Our technicians can help diagnose recurring clogs, suction problems, airflow restrictions, and other vacuum issues.
If your vacuum keeps clogging and you’re tired of clearing the same blockage over and over, bring it to Gator Vacuum & Sewing for professional troubleshooting and repair.
Frequently Asked Questions About Vacuum Clogs
Why does my vacuum keep clogging with pet hair?
Pet hair can accumulate around the brush roll, inside hoses, and throughout the cleaning path. Long hair can also combine with dust and debris to create dense blockages. Regular brush-roll cleaning and filter maintenance can help, but persistent clogging may indicate an airflow restriction or component problem.
Why does my vacuum lose suction after it gets clogged?
A blockage restricts the movement of air through the vacuum. Even after removing the visible debris, additional material may remain farther inside the hose, wand, floor head, or internal airflow path.
Why does my central vacuum keep clogging?
Central vacuum systems can develop blockages in the hose, wall inlet, tubing, or near the power unit. If only one inlet has weak suction, the restriction may be localized. If suction is weak throughout the home, the problem may involve the main system.
Can a dirty filter cause a vacuum to clog?
Yes. A heavily loaded filter can restrict airflow and reduce vacuum performance. Follow the manufacturer’s instructions for cleaning or replacing the filter.
When should I take my vacuum to a repair shop?
Consider professional inspection if your vacuum continues to clog after routine maintenance, has persistent low suction, overheats, makes unusual noises, shuts off unexpectedly, or repeatedly develops a blockage in the same location.
How can I prevent my vacuum from clogging?
Empty the bag or dirt container regularly, maintain the filter, clean pet hair from the brush roll, remove large objects before vacuuming, and periodically inspect the hose, wand, and floor attachment for debris.
Where can I get vacuum repair in Coral Springs?
Gator Vacuum & Sewing provides vacuum repair services in Coral Springs and the surrounding area. If your vacuum has a recurring clog or another problem that basic maintenance isn’t resolving, professional troubleshooting can help identify the cause.
If your vacuum continues to clog even after you’ve checked the hose, filter, and brush roll, the problem may require a closer inspection. Our vacuum repair services can help identify airflow restrictions, worn components, and other issues that basic cleaning may not resolve.
A vacuum that repeatedly loses suction, overheats, or develops the same clog may be dealing with more than routine debris buildup. Gator Vacuum & Sewing offers professional vacuum repair in Coral Springs to diagnose the underlying cause and help restore proper performance.
If you’ve already tried basic troubleshooting and the problem keeps returning, professional service can save you from repeatedly clearing the same blockage. Visit our vacuum repair service page to learn more about repair options for upright, canister, and other vacuum systems.